Call business service
Introduction
A new module is introduced in Axelor Connect 3.0 to call APIs developed in enterprise or client projects.
Configuration
Call business services module introduces a set of components which can be used to configure the web services called from Axelor Connect.
@Connect
An annotation to add on the methods exposed to Axelor Connect.
@Path
@POST
@Connect(
    name="Create order", (1)
    description = "Create order from Axelor Connect", (2)
    tag = "Sale" (3)
)
public void create() {
    // implementation...
}| 1 | Required, it takes a unique and descriptive name for the web service. |
| 2 | Optional, describes what the web service does. |
| 3 | Required, defines to which module the action belongs to. |
The tag is a key used to group the web services you want to expose to Connect, even if they have different characteristics:
-
Functional module: Sale, CRM, BPM, Project…
-
HTTP method: GET, POST, DELETE…
-
Related model: Product, SaleOrder, User…
| It is recommended to define a string constants for tag name instead of using hard-coded values. |
Scan package
At startup time, the context scans the AOS package com.axelor.apps by default to extract all the tags defined within it.
To scan a custom package during startup, override the method getPackagesToScan of class ConnectWebServiceServiceImpl:
public class ConnectWebServiceServiceCustomImpl extends ConnectWebServiceServiceImpl {

  @Override
  protected Set<String> getPackagesToScan() {
    Set<String> packages = super.getPackagesToScan();
    packages.add("com.customer");
    return packages;
  }
}
Then bind it in the module configuration:
@Override
protected void configure() {
    bind(ConnectWebServiceServiceImpl.class).to(ConnectWebServiceServiceCustomImpl.class);
}
Rules to follow
-
Use DTOs: In the controllers, it is recommended to not use the persisted entities as entry of the methods, instead define custom DTOs.
-
Constructors: Ensure the DTOs have a default constructor to bind the incoming JSON data properly.
-
Required field: To set a field as required, add on it the annotation
@NotNullfromjava.validation.constraintspackage. -
Min & Max: The annotations
@Minand@Maxare managed by the module to set the min and max values for fields of type number or length for text fields. -
Query parameters: To bind query parameters automatically, use the annotation
@QueryParam. -
Path parameters: To bind path parameters automatically, use the annotation
@PathParam. -
Body: The parameter representing the body of the request should have no annotation.
Use case
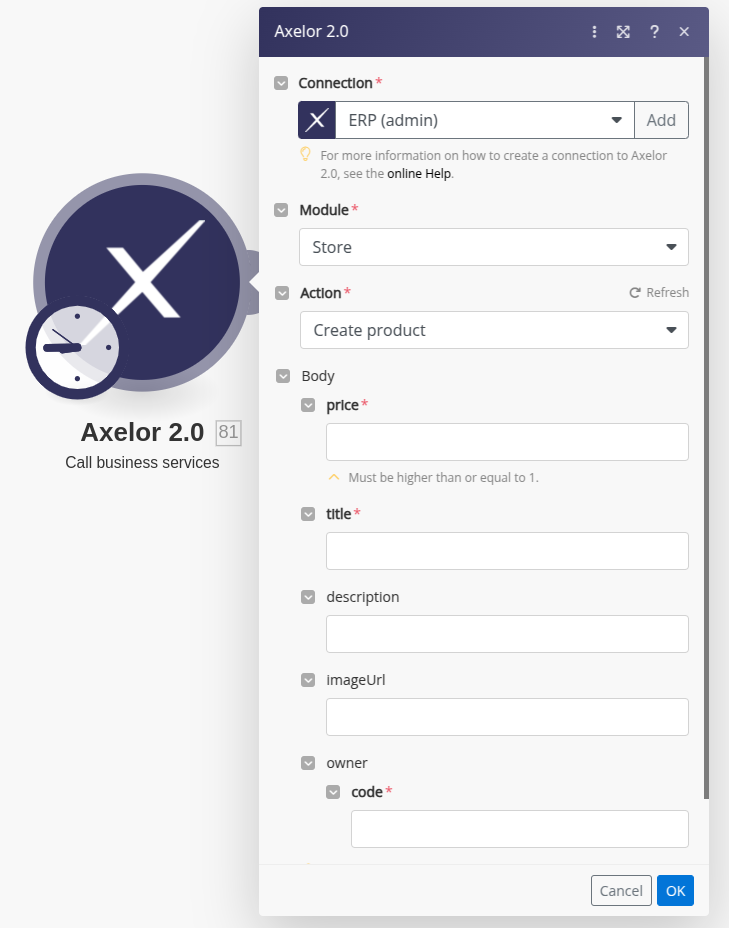
Let’s configure an API endpoint to create a product from Axelor Connect using Call a business service module.
Create the controller
The API should be defined in a controller with the annotation @Path.
@Path("/store")
public class ConnectStoreController {

    @POST
    @Path()
    @Connect(name="Create new product", tag="Store")
    public Response create(ProductDto productDto) {
        // business logic...
    }

    @PUT
    @Path("/{id}")
    @Connect(name="Update product", tag="Store")
    public Response update(ProductDto productDto, @PathParam("id") Long id) {
        // business logic...
    }
}
Axelor Connect
From Axelor Connect, follow the steps below:
-
In your scenario, Click on add module icon.
-
Search for Axelor 3 app.
-
Search for Call business service module.
-
From the module configuration, add the connection.
-
The list of modules will appear in selection input.
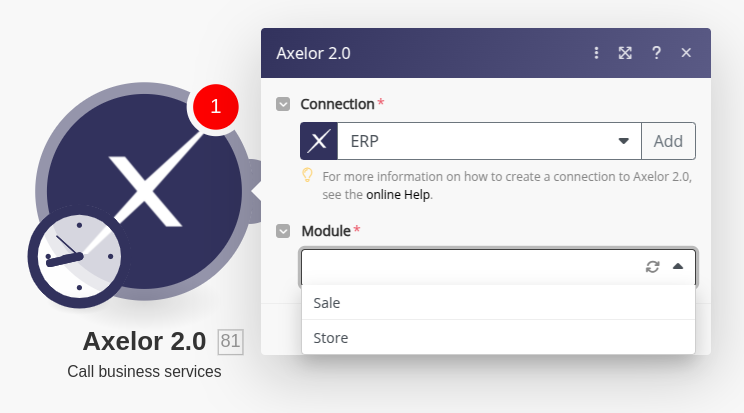
-
Once you select a module (i.e. Store), a dropdown menu appears to select an action.
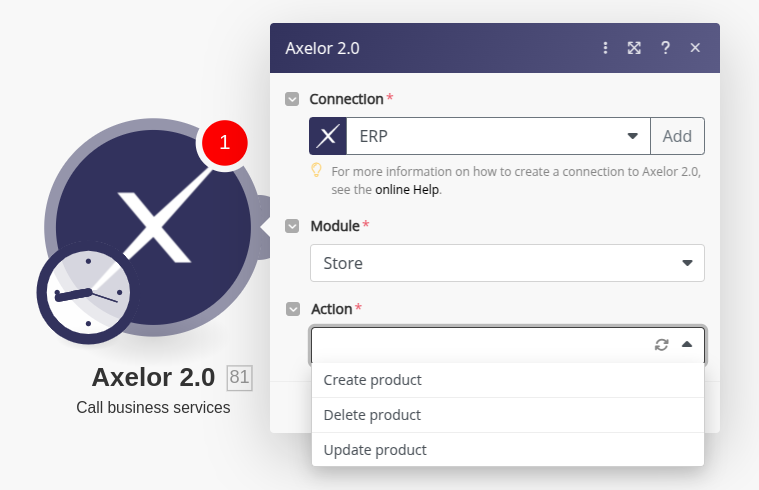
-
Select an action (i.e. Create product). The full form opens.