How the tool works
The operation of Axelor Template is relatively simple, both in its technical operation and in its handling on the user side. Axelor Template searches for all {} markers in the template and replaces these markers with the corresponding dynamic data.
Several syntaxes are allowing many operations to be performed, including: Replacing a field with dynamic data Data formatting Repetition of a portion of a document (a table line or anything else) Conditional display of data
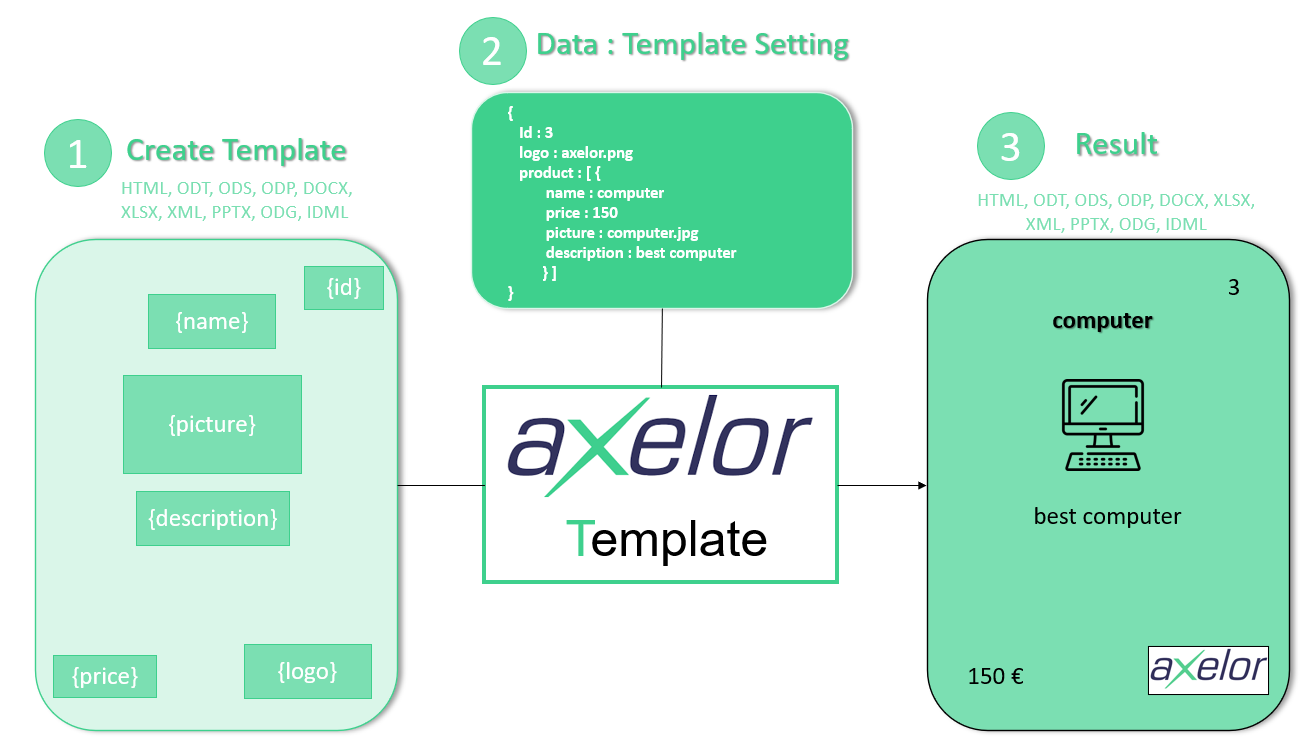
Process of creating a document
1. Creation of templates from a text editor
The model allows you to create the document of your choice using the functionalities of Word for example. Template creation is therefore accessible to everyone because it does not require any technical skills. We can then insert dynamic information inside using a particular syntax.
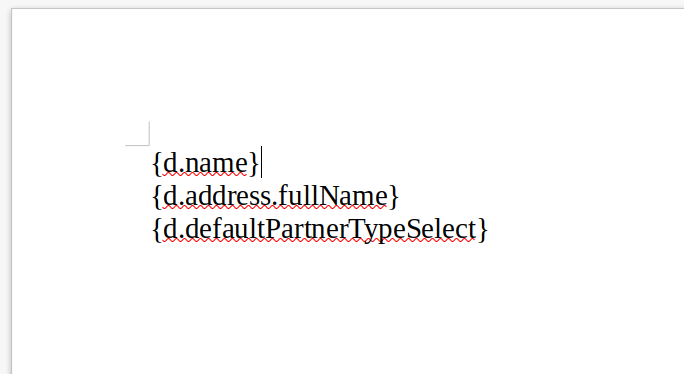
The dynamic information must be in this format {d.parametername}
Here is the list of document extensions available for your templates and the associated output formats.
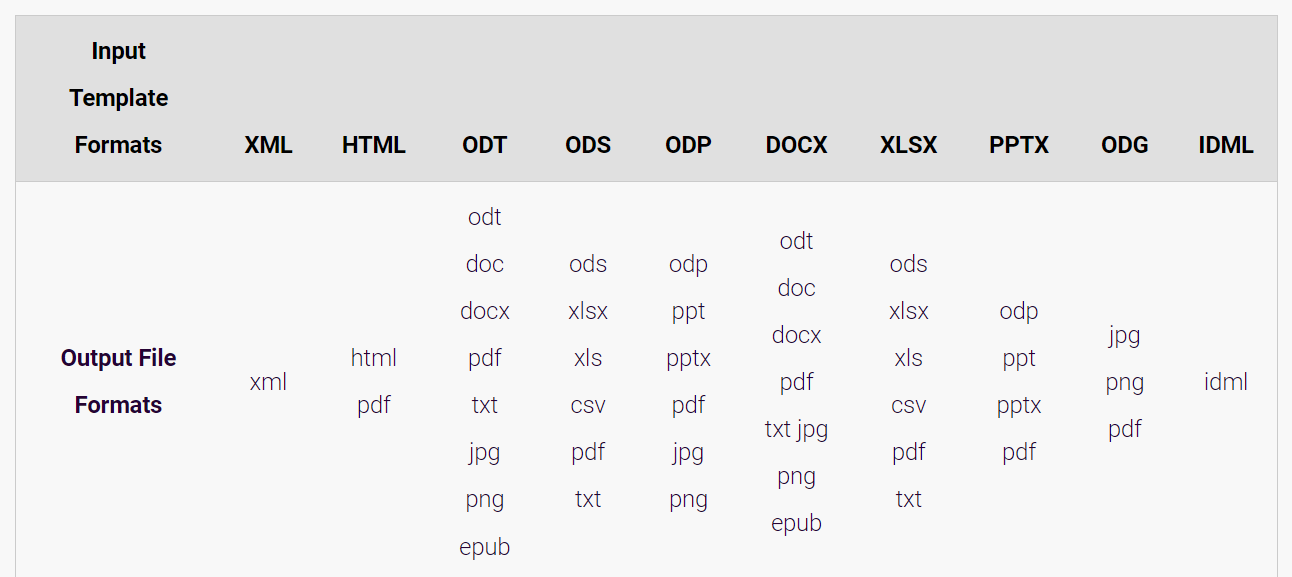
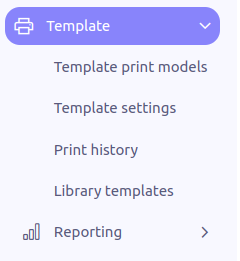
Axelor Template supports a variety of formats, such asdocx, pptx, html to name but a few. Adding your template to Axelor template is done from the menu: Print template Template.
Once the template is completed and saved in the desired format. You must create a template print template.
2. Creation of your printing model
The creation is available at the top left: + from the Print Template menu.

The menu print template Template allows you to link the settings, therefore the JSON data and the model. Here is the template creation interface:

-
Name: this is the name of the print model
-
Rendering conversion format: the output format is directly calculated according to the template extension.
-
Template: this is where you enter your template either via the icon in the taskbar with the “Upload model” button
-
To download it you can click on the name of the model or use the “Download model” button in the taskbar.
-
To delete the template you can click on the icon.
-
Template settings: corresponds to the Metamodel of the linked template setting
-
Application condition: this is a field that allows you to filter according to a groovy condition whether or not the template appears in the list of models offered during printing
-
Attach generated file to the record: allows you to attach the printed document directly to the AOS model corresponding to the Meta model
-
Print title: this is the name of the printed document
-
Mention in the title of document: this parameter allows you to complete the name of the printed document with a dynamic variable. For example, if you want to enter the invoice ID in the printed document.
To use the print template created, it is necessary to click on the “Upload template” button. A unique ID is generated for your print template.
To modify the model, you must delete the existing model which will remove the generated ID. You can then select a new one then click on the "Upload model" button.
3. Creation of your game data in JSON format
Datasets in JSON format are used to populate the templates. These are the data that will replace the {} tags in your template. The datasets are generated from Axelor models but it is also possible to add your own tags to the JSON.
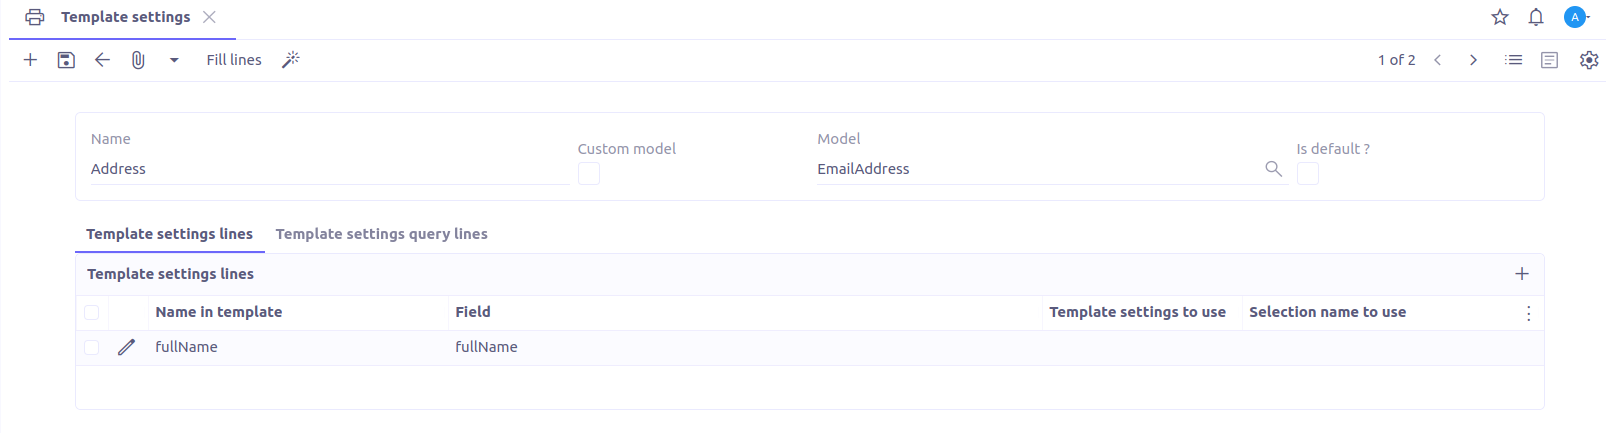
The creation of these datasets is done from the menu: Template settings
It is necessary to create a setting for each object used (Company, Address, City, etc.).
This is where we ask from our template to replace the tags with json variables. This data is entered in the Template settings.
The creation is available at the top left: + from the Template Settings menu.

Here is the interface for creating your Template settings:
-
Name : Name of the Template setting
-
Model: this is the object in Axelor that we wish to target to retrieve these attributes which will be used in our model.
-
Is default ? : Allows you to define our template settings as a reference
The table: Template setting lines represents the structure of our JSON.
-
Name in template : Attribute name in JSON
-
Field: Simple or pointed database field, this is the value linked to the attribute. This field is groovy.
-
Template settings to use: In the case of relational fields, you must define a setting for the corresponding object and enter it here
-
Selection Name to use: In the case of selection type fields, you must enter the name of the selection associated with the field in Graf
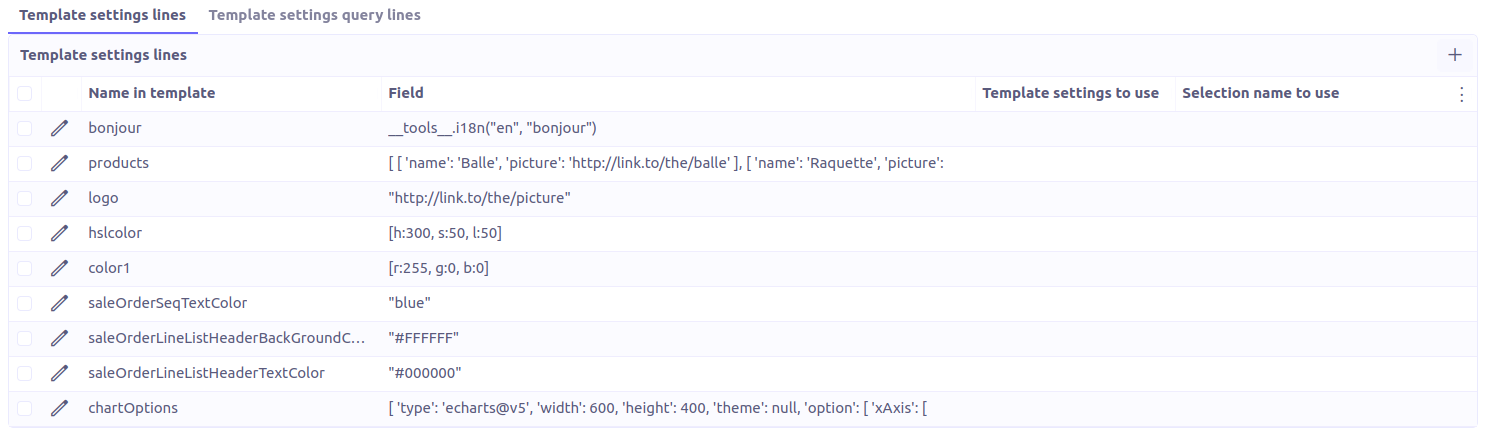
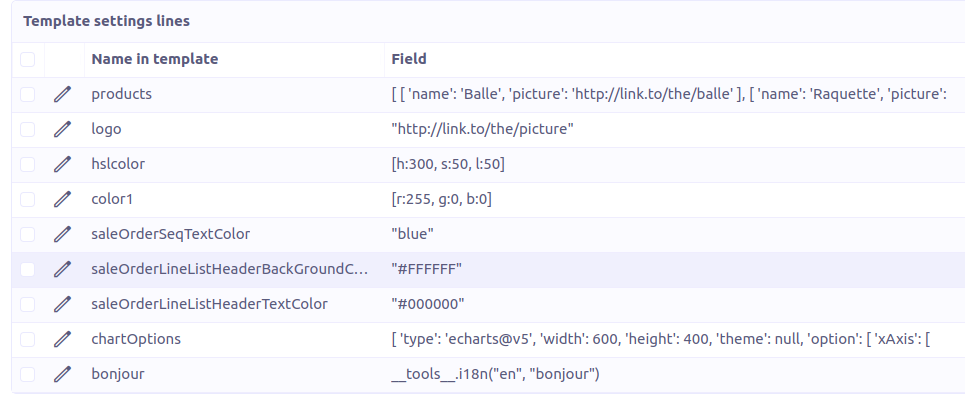
The list of Template settings lines should ideally contain only the fields used. It can be filled with 3 manners :
-
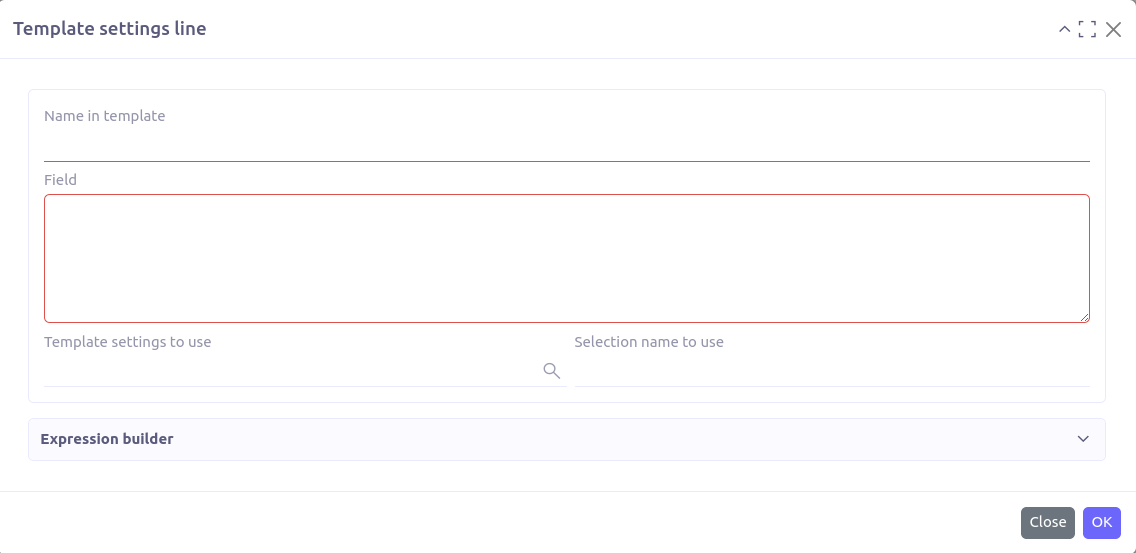
Manually, the necessary fields are entered as you go.
To add a line manually you must click on “ + New”. A pop-up opens:
-
Name in template : Attribute name in JSON
-
Field: Simple or pointed database field, this is the value linked to the attribute. To fill in this field, you must respect the syntaxe groovy.
-
Template settings to use: In the case of relational fields, you must define a setting for the corresponding object and enter it here
-
Selection Name to use: In the case of selection type fields, you must enter the name of the selection associated with the field in Graf
-
-
By clicking on Fill lines, in this case all the fields are automatically added by taking the attributes of the Meta-model object selected before and you must then delete those which are not used

-
By using the querly line template thus retrieving data from a view action
Fordisplay sub-objects, there are several possibilities:
Create all fields one by one in each model and in the model call the pointed fields
Create the pointed field directly in the concerned setting (in this case, you have to think about the "?" to verify that the object exists, it is not obligatory but recommended)

4. The impression
In order to start printing, you must go tothe view of the selected template and click on the button: Template This button is only available when the Meta-model is completed. If there is no Meta-template entered in the Template settings, the “Template” button will not be visible in the corresponding view.