Base app configurations
Application Config
Access: Application Config → Apps management → select the app and click on "Configure."
Save
To ensure the changes that had been made at the application configuration level are taken into account, it is essential to save any modification and then refresh the browser.
Activate a Feature in the Application Config
In the Application Config, activate a feature. Then click on the Save icon.
Some features, once activated, are saved automatically. However, this is not a rule, and it is better to save every change made.
Refresh the browser.
Save modifications on a file
When you create a new record or make modifications, remember to save by clicking on the floppy disk icon.
Base Configuration, Configuration Tab
Access: Application Config → Apps Management → Base, configure.
Here, you will find many useful basic configurations. Activate or deactivate these configurations according to your needs.
Enable trading name management
Activating this feature allows you to enable a finer subdivision of the company in the application. This feature is useful when entering data. For example, you can specify the relevant business unit when creating a quote, an invoice, etc.
Activate sending mail
Activating this feature allows you to send emails when the SMTP configuration has been set up.
Manage mail accounts by user
Instead of using a shared SMTP account for sending emails on the application, it is possible to configure a connection to email boxes for each user profile.
Manage mail accounts by company
Instead of using a shared SMTP account for sending emails on the application, it is possible to configure connections to email boxes for each company.
Default Units
Define the units used by the system by default. For example, determine the duration of a workday. The default values can be changed later on a particular file.

Manage Multi Banks
By activating this feature, you can use several bank accounts for the same company. This option will allow you to select a bank account that you can use in certain features (e.g., Payment Entry, Bank Order etc).
Messaging, Calendar, Documents, Team Management
Activating these features results in the appearance of the menu entries Messenger, Calendar, Team Work, and Documents.
Messaging: this feature activates the Messenger, which is an internal messaging system with an inbox. You will receive all internal ERP notifications in this messaging system.
Calendar: manage events with the Calendar.
Documents: this option activates e-document management. The Documents application menu appears on the left side among other menus and is used to import and export files, create documents and folders, and manage their organization.
Teamwork: allows you to manage teams and team tasks.

Number of digits for Tax Rate, Unit Prices, and Quantities
These three fields allow you to configure the precision after the decimal point.
Decimal management for currencies
A new field in the currency allows you to specify the number of decimals to take into account in the total amounts of various documents (invoice, sale order, payment, accounting entry) and subtotals depending on the currency.
If required, you can create a currency from the Currencies menu and add the number of decimals. Access : Application config → General data → Currencies
- Number of decimal: enter the number of decimals on the currency record. For example, 2.
- Example of decimal digits on currencies on an invoice:
Access: Invoicing → Customer invoice
-
Add the necessary information (tax position, price list, etc).
-
Add a currency. In the example, it is Yen (this currency does not have a set number of decimal places).
-
Add an invoice line with a product.
-
Total A.T.I.: you will find that Yen has no decimals, so the total amount is equal to 307,208 Yen.
However, if you select a currency that uses decimals, this fact will be reflected in the total amount.
Access : Invoicing → Customer invoice
-
Add the necessary information (tax position, price list, etc).
-
Add a currency. In the example, it's Euro (on the Euro file, the number of decimals is equal to 2).
-
Add an invoice line with a product.
-
Total A.T.I.: you will see that the Euros have decimals, so the total amount is 2,147.92 Euros.
Default Partner Localization
When selecting a country in this field, it will select a default language that will be used for generating documents.
Currently the language feature is available for French and English languages only.

Manage subsidiaries on Partners
This option allows to associate a parent company partner from a partner record. A list is also displayed in this record containing the associated subsidiary companies (Partners with the consulted record as the parent company).
Check existing sequence on Generation
This feature allows to verify that the automatically generated sequence does not already exist in the application. If it does, an error message will be displayed, asking to correct the sequence configuration.
Draft Prefix for Sequences
It is possible to configure the default prefix associated with the sequences of records in draft status. The default value is # (e.g., for an invoice: #102).
Activate Barcode Generation for products
This feature activates the barcode management on a product file.
Generate a Sequence for Partners
Generate a Sequence for Partners: this field allows assigning a sequence number to each created partner as configured in the sequence table (Document concerned = 'Partner') via a specifically configured sequence (General Data / Sequences).
Manage Product Variants
Once this option is activated, you can create product models in the product referential files (Application Config → Repository → Referential). From a model, you can create different variants of a product, each one possessing certain attributes (color, size, etc.).
Template for changed password
With this feature, you can use an email template for password changes.
Number of Tasks Generated at most at once
Corresponds to the maximum threshold of recurring tasks at generation.
Timeout for processes (seconds)
The maximum waiting time that a process that has been launched by a user takes before continuing in the background.
Enable Multi-Company Management
Enable multi-company management on the application. When this option is disabled, it is only possible to manage one company in the program.
Store streets
When activated, this feature will copy street numbers and names directly on the address form, instead of being dynamic (on the internet).
Shared address
This option allows you to define whether an address can be shared or not.
Enable tax numbers
This option allows you to enter tax numbers from the Company record.
Company-specific product fields
Define which Product fields will be overridden by the company.
Default mail message template for notifications
Configurate the default email template. It will be used once an email alert is sent.
Manage related CC & BCC emails
This option allows managing CC & BCC during email sending.
Email template list for notifications
Depending on the app, you will be able to use a default email template when an email notification is sent.
Base Configuration, Interfaces Tab
Click on the Interface tab to access the external web services configurations.
Mapping
Enter in this field the link to the Mapping service provider to use for all map functions. There are two choices: Google or Open Street Map.
Google Maps may charge a fee for its services.
QAS Address Validation
When this feature is active, configure the QAS web service that is used to format and validate addresses.
You can verify the connection to this service by clicking the button: “Test connection to QAS web service”.
Web Services: Currency WS URL
This feature helps you to connect to a web service to retrieve exchange rates. By default, the proposed exchange rate is ECB (European Central Bank). It is also possible to connect to the Fixer web service (https://fixer.io/).
Geonames
Here, configure the folder where are located the dumps for the address base and the ZIP file (the fields "GeoNames Dump URL" and "GeoNames Zip URL").

Base Configuration, Currency Conversion Tab
In this tab, you can manually create inter-currency exchange rates. The Update & Historize Conversion Rate button is used to perform an automatic update from the web service configured in the Currency WS URL field (Currency Exchange Rates URL, Interfaces tab). You can also archive the rates by clicking on this button.

Base Configuration, Global Tracking Configuration Tab
Track object fields with it. Actions performed on this field are traced and viewable within a global tracking configurations lines table. These can be actions of creation, modification, deletion, export, or reading. In this example, we trace every action performed on the fields: simple full name, full name, and first name of the Partner object with a partner category that corresponds to x.
Base Configuration, Printing Tab
Regroup Products on Prints
This option activates the possibility of grouping lines by products during the generation of print documents (sales quotes, purchase orders, stock movements, invoices).
Templates
Templates allow associating a BIRT template for printing certain documents (product catalog, directories).
BIRT Printing Settings
BIRT printing settings allow associating a template (BIRT) with a data model.
The BIRT templates are not available on versions 8.1 and higher. You can still however configure BIRT templates via Application Config → BIRT printings → BIRT templates.

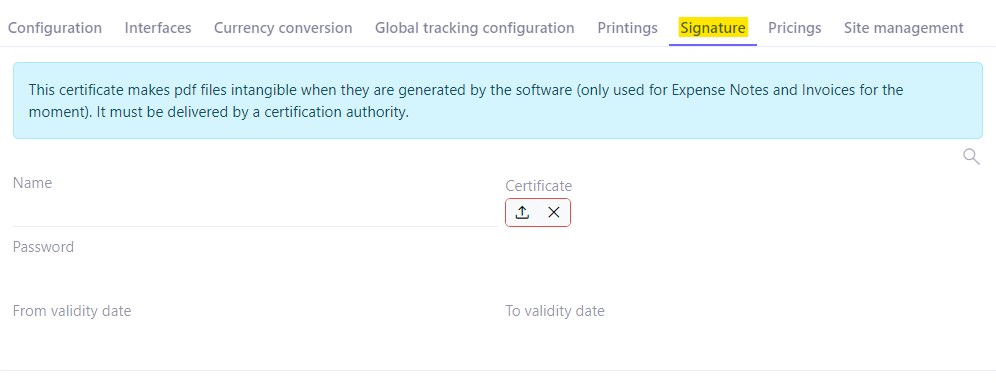
Base Configuration, Signature Tab
The Certificate field adds a PFX digital certificate in the application that will be used to sign deposited documents. One way to use it in Axelor Open Suite is to provide compelling value to expense report receipts, deposited on the expense report lines.
Base Configuration, Pricing Tab
In this tab, click on “Enable pricing scale” to activate the pricing scales. The Pricing menu entry will appear in the Sales module. Other settings will be available in the Application Config menu, in the Sales module configurations (for example, there is a feauture “Enable calculation of the entire quotation's prices”).
Pricing in AOS serves to create calculation rules to evaluate a field (an integer, a decimal, a date, etc.) of an object (an order line, an order, a quote, a stock movement, etc.), based on parameters (called classification rule).
The pricing scales also apply when the product is added as an additional object.
