Calendar
Activate the calendar
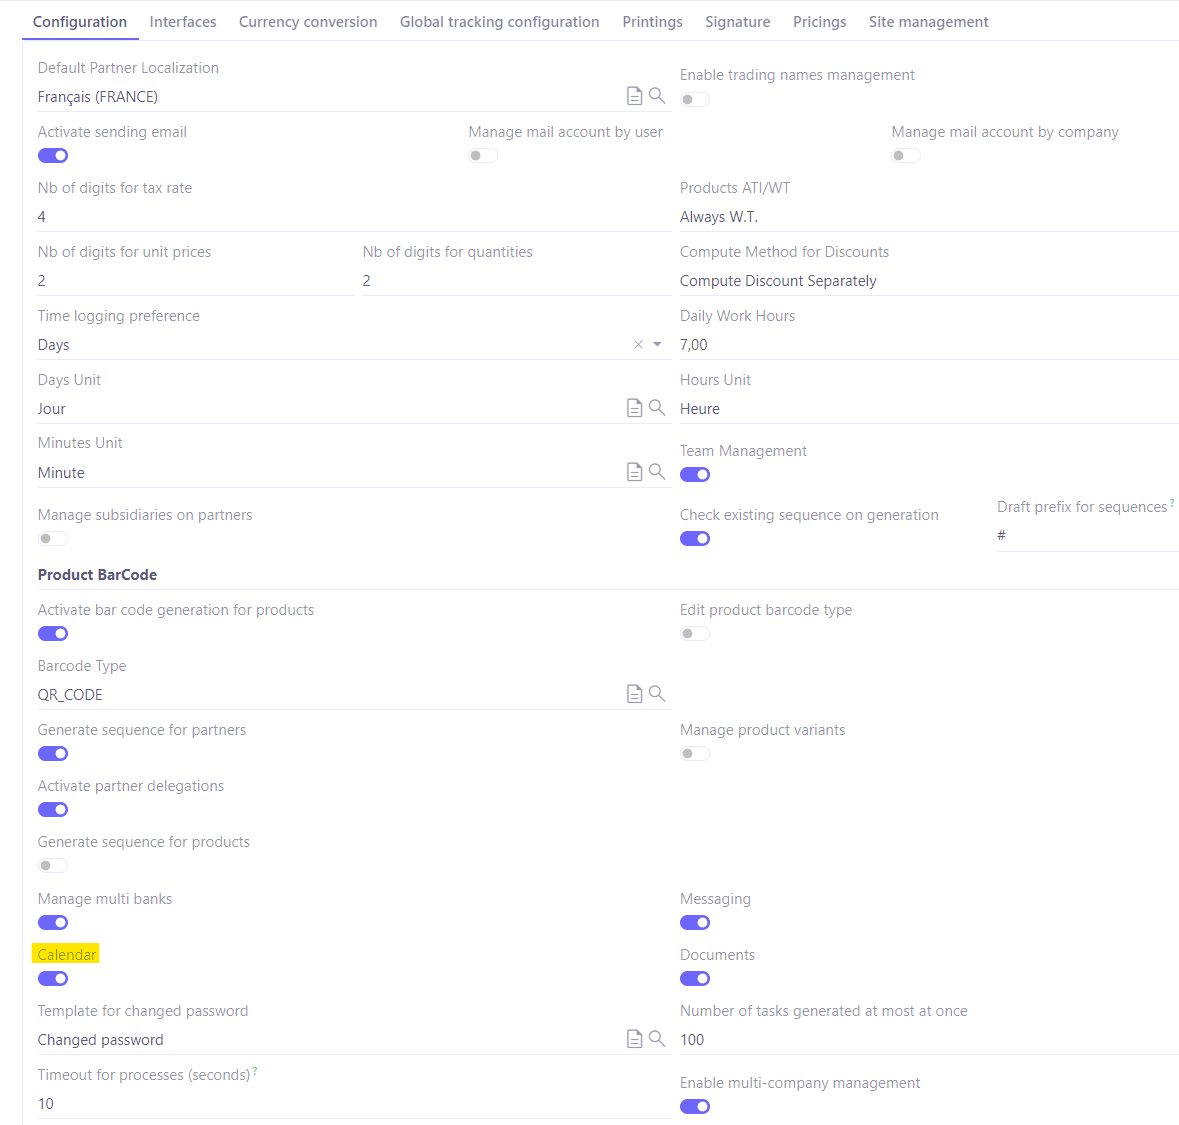
Activate the calendar from the configuration of the Base app.
Access: Application Config → Apps management → Base, configure → Activate the Calendar option (Configuration tab, at the bottom of the page)
The Calendar entry menu will then appear on the left.
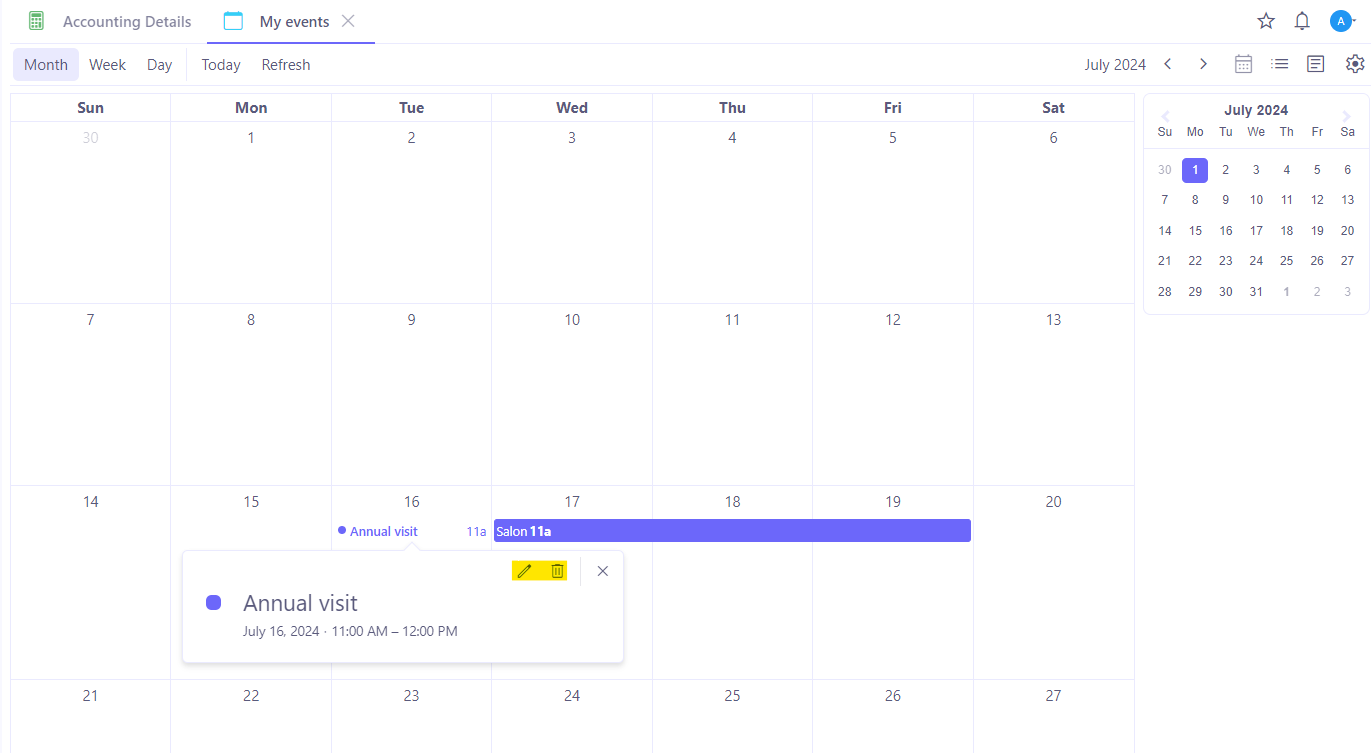
Events are visible from the Calendar. Events can be created from different modules.
In the Calendar, navigate among the different views available (month / week / day).
View Events
If you wish to view an existing event, click on this event in the calendar and then click on "Edit."
Edit an event: if you wish to edit an event, click on the event in the Calendar, and then click on the pencil icon to edit it.
Delete an event: if you wish to delete an event, click on the event in the Calendar, and then click on the Delete icon to delete this event.
Create an Event from Calendar
Click on the day in the Calendar for which you wish to create an event. The event creation form will open.
-
Give a name to the event and then fill in the essential information, such as start and end dates. Add guests.
-
Fill in the description in the Description tab.
-
In the Organization tab, you can fill in geographical data (coordinates, an organizer, and to whom it's assigned to).
-
In the Information tab, fill in the fields "Type," "Visibility," "Availability," and "State." In the Type field, select the type of event (Event / Note / Call / Meeting / Task / Leave).
Synchronize a Calendar
Access: Calendar → Configuration → My Calendars
-
If you wish to synchronize a calendar, do it in "My Calendars."
-
Fill in the essential information and define the owner.
-
Fill in the connection settings in the "Connection Settings" tab.
-
To synchronize your email calendar (Google), for example, with the Axelor Open Suite interface, you must configure this synchronization. You must fill in the fields as follows:
-
URL: calendar.google.com (for GCAL).
-
Type: the type of your external agenda, for example, GCAL for Google Calendar.
-
Enable SSL if needed: the SSL protocol secures synchronization by encrypting the transport layer.
-
Advanced Synchronization: it is very important to specify the type of event to synchronize. By specifying that it is a CRM synchronization, when a modification is made from the remote calendar, the CRM event will be modified not only in the remote calendar but also in the CRM module calendar.
-
Synchronization duration (week): the number of weeks before and after the synchronization date; only events from this period will be synchronized, and this choice can also impact synchronization processing time. It is not recommended to exceed 1 week for performance reasons.
-
Keep remote: by checking this box, you prioritize the remote calendar when synchronizing the two calendars.
-
Identification: before any identification, it is necessary to authorize the ERP to connect to your external account; for Google Calendar, simply check this box via the following link “https://myaccount.google.com/lesssecureapps“. Log in.
-
Click on the “Actions” button (you can find it at the top of the page): the Actions button allows you to Export / Import / Synchronize the calendar. Note that it is essential to fill in the fields in the "Connection Settings" tab if you wish to export / import / synchronize the calendar.
-
Existing events will be displayed in the Events table.
In the Events tab, you can click on the gear icon to Refresh or Export the list of events.
Once synchronization is enabled, deleting any event from the tool will be reflected in the remote calendar.
Share a Calendar
Access: Calendar → Configuration → My Calendars
-
While creating your calendar, click on the Sharing Settings tab.
-
Select a user with whom you wish to share the calendar by clicking on +.
-
Then, define the rights of this user i.e if he can only read the info or does he have a right to edit it (select “Read-only” or “Modification”).
View the calendars that are shared with you here: Calendar → Configuration → Shared with me.