Company file
Enable Multi-company
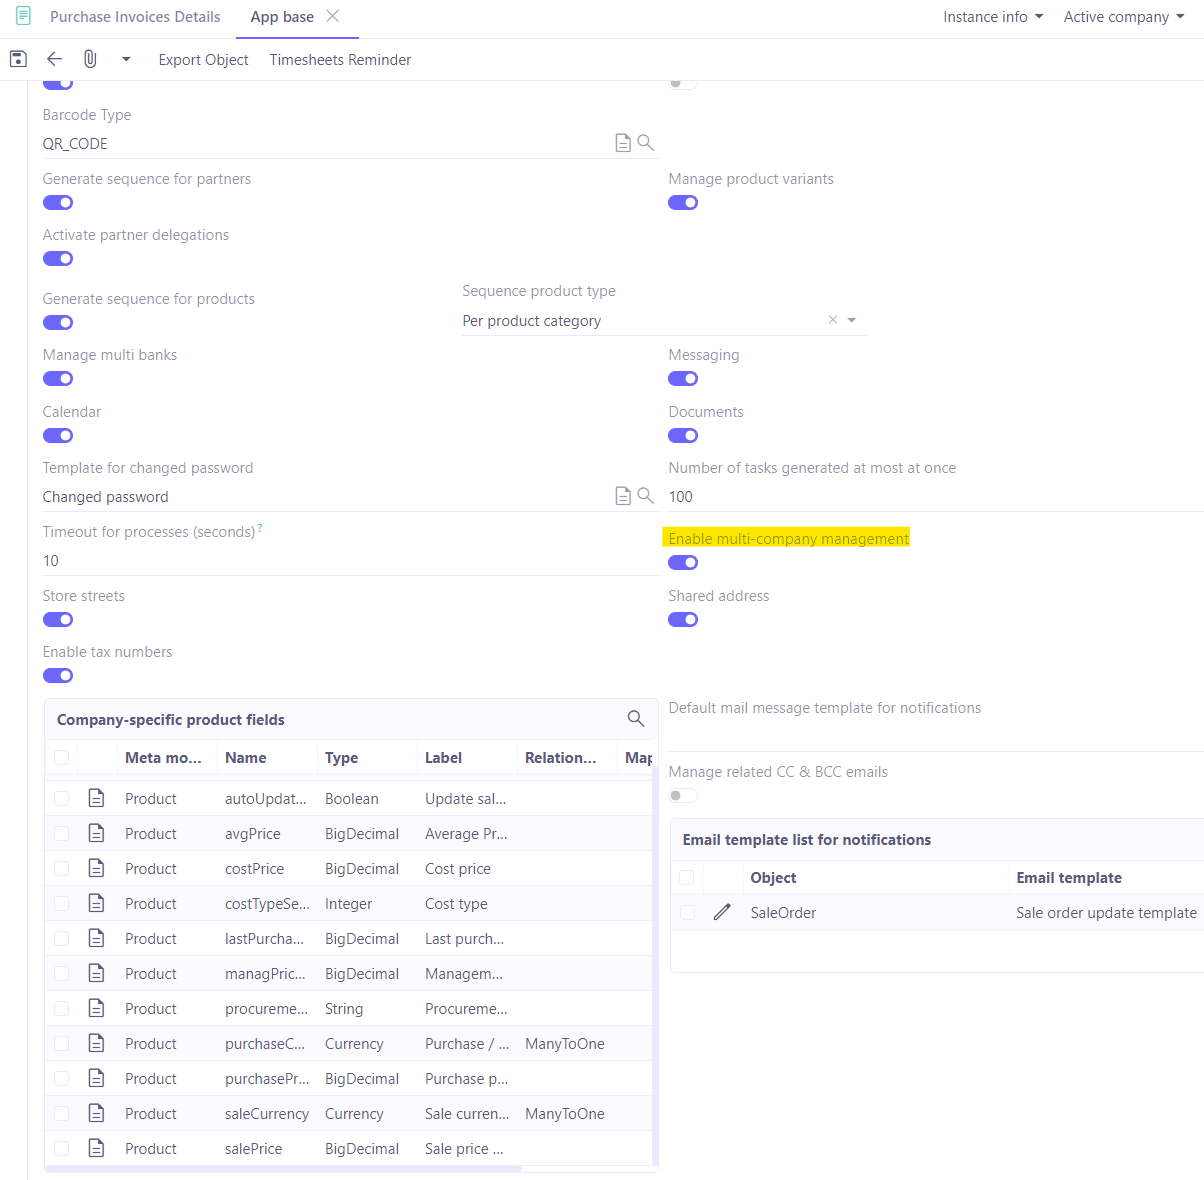
If you want to manage multiple companies, it is necessary to enable the multi-company option in the configuration of the Base module.
Access: Application config → Apps management → Base, configure → activate the "Enable multi-company management" option.
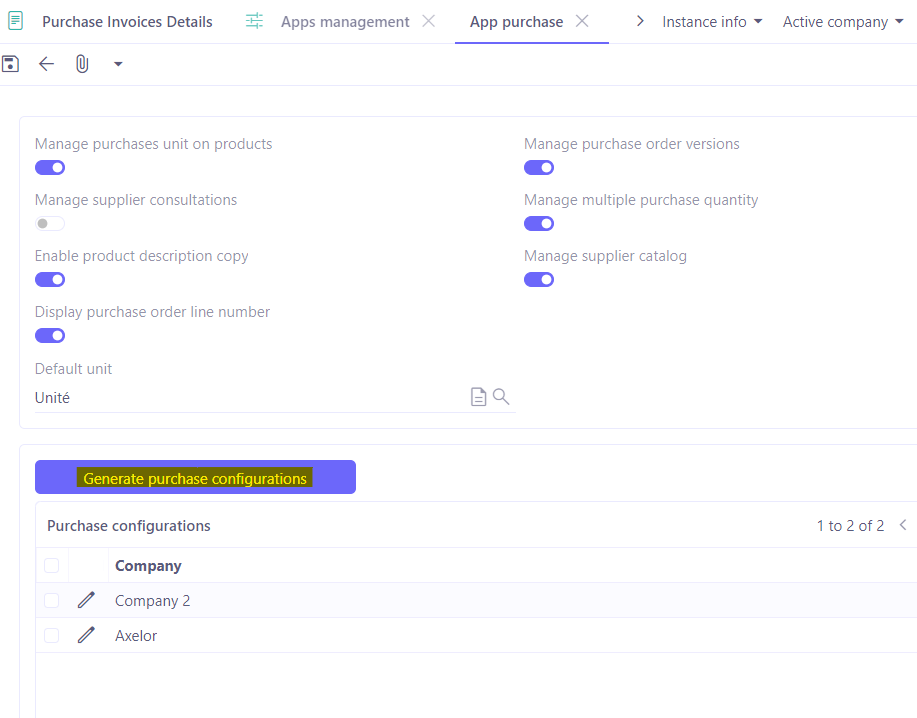
If the multi-company options do not appear at the bottom of each app page, click the "Generate configurations..." button. All existing companies will then be displayed and available for separate configuration.
In the case of multi-company, note that the configurations available upon opening an app apply to all companies. However, the configurations specific to each company are available at the bottom of the page in the Company section. Click on a company to add configurations to that particular company.
Company file
Information Tab
Access: Application config → Users / Company → Companies
-
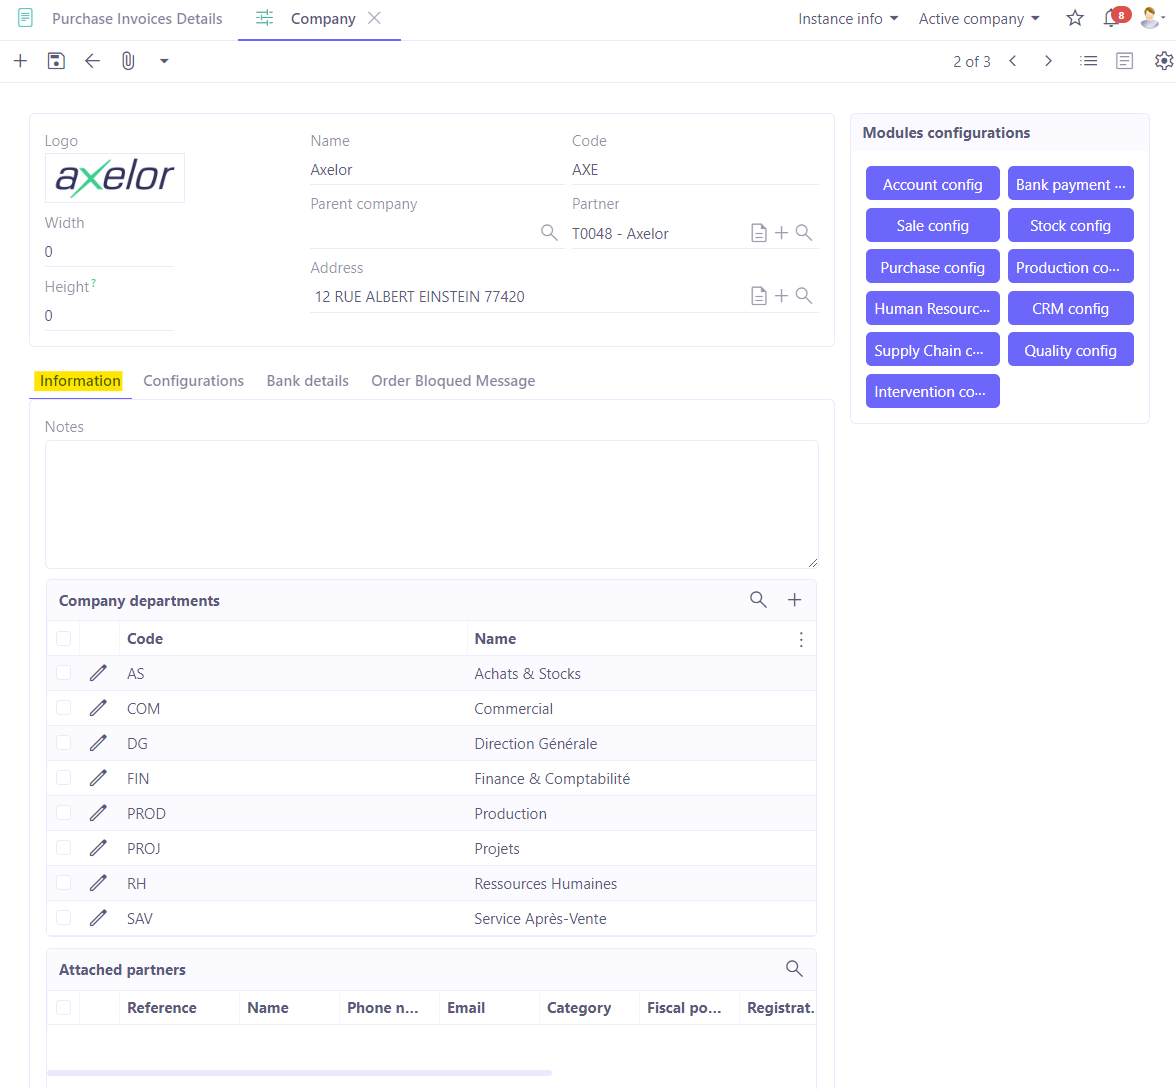
Enter essential information.
-
Attach a third party. This third party can be defined as a customer, supplier, etc. By attaching it, you will find the general information about this third party.
-
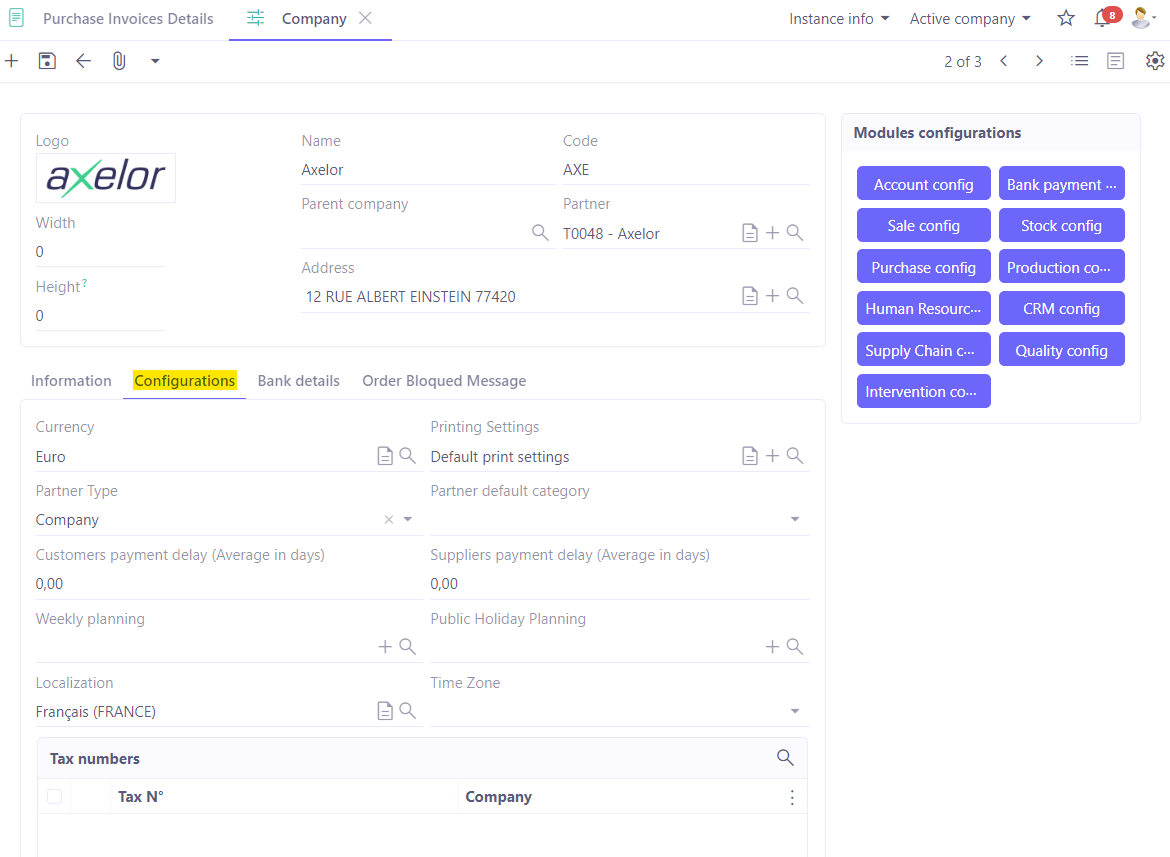
In the "Configurations" tab, select the printing settings. Without specifying the printing settings, it will be impossible to save the company's sheet.
-
Once the sheet has been created and saved, module-specific configurations will appear on the right. Accessing these module configurations allows you to open configurations by company directly.
-
Services: on the company sheet, find the different services of the company. Either click on "Select" to choose services from a list or click on +New to create a new service. It is also possible to create a new service in the configurations. Access: App configuration → Users/Company → Configuration → Services. The newly created service will be available in the list, and you simply need to click on "Select" in the "Services" section on the company sheet.
If you have companies with a company defined as a parent on the company filz, you will be able to find its parent tree.
Access: Application config → Users / Company → Company tree → click on the parent company to view attached companies.
Configurations Tab
-
Currency: define the currency. The currency will be used in all company transactions.
-
Print settings: define the print settings. When it comes to default settings, you will find the standard configuration of the different BIRT templates. These standard settings include a company header and a company footer. For example, this information is used for printing a customer quote.
-
Third-party type: select from Company or Individual. That is, when creating a third party, the type will be predefined as Company. However, it is always possible to change the third-party type when creating the third-party sheet.
-
Default third-party category: select from Customer or Supplier. That is, when creating a third party, the category will be predefined as Customer, for example. However, it is always possible to change the third-party category when creating the third-party sheet.
-
Customer payment term (average in days): indicate here the default customer payment term.
-
Supplier payment term (average in days): indicate here the default supplier payment term.
-
Weekly schedule: create the schedule directly from the company sheet or select a pre-existing weekly schedule. Access: HR → Employee management → Configuration → Schedules → Weekly schedule. These data are used in the HR module (example: Timesheet entry, Leave management).
-
Holiday schedule: create the schedule directly on the company sheet, or select a pre-existing holiday schedule. Access: HR → Employee management → Configuration → Schedules → Holiday schedule. These data are used in the HR module (example: Timesheet entry, Leave management).
-
Location: select the country and language. The chosen language (English or French) will be used by default on all documents and message templates / BIRT templates.
-
VAT numbers: enable VAT in the Base module and then enter the VAT on the company sheet. Access: App configuration → Application management → Base, configure → Enable VAT numbers. Then, enter the VAT numbers on the company sheet.
Bank details tab
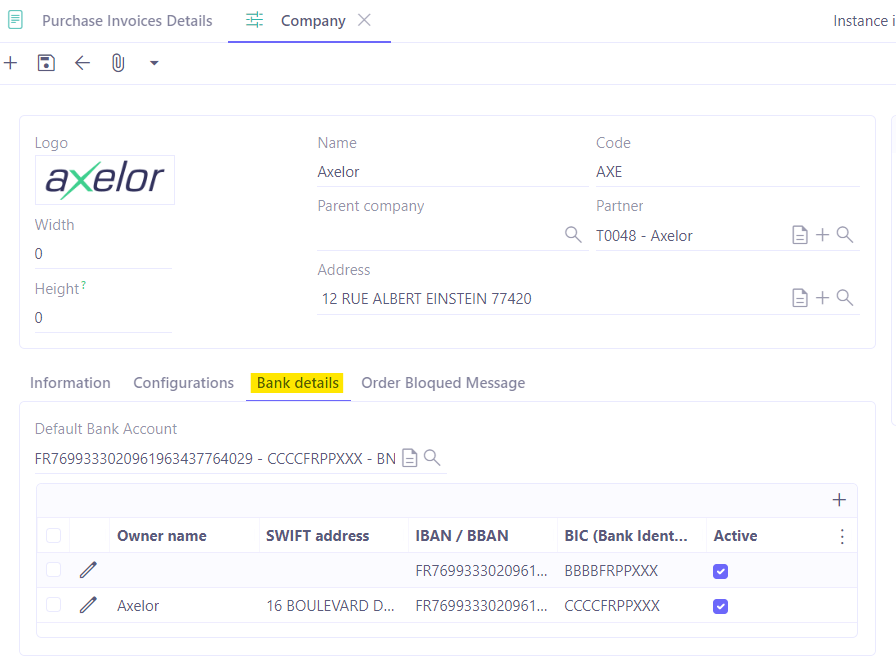
When invoices are generated or an invoice is created, the system automatically retrieves the bank details entered on the company file. On the company file, click on the Bank detail tab and select a default bank account to apply to the company. If the bank account is unavailable, you must create one. It is possible to configure multiple bank accounts for the same company.
Access: App configuration → Users/Company → Configuration → Bank detail.
-
Click on +.
-
Add new bank details.
-
Save.
-
On the company file, in the Bank details tab, select a default bank account.
Order blocked message
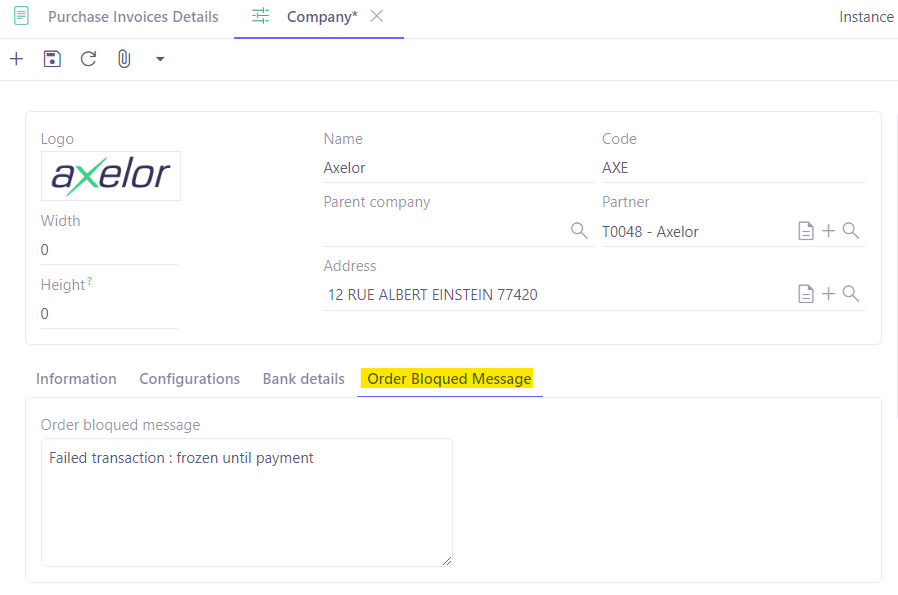
When there are blocked orders related to a blocked third party (regarding the blocked third party, consult the Sales module documentation), a message for blocked orders is displayed by default. In this tab, you can configure this blocking message.
