Helpdesk
We are excited to inform you that we are working on an updated documentation which will be released soon. In the meantime, you are welcome to use the current version as it remains completely valid for your needs.
This application will allow you to manage customer support. You will be able to open tickets, assign them to users and track their progress. Axelor also manages the service level agreement (SLA) by allowing you to define your own application rules according to certain criteria.
- Keywords :
- SLA: The service-level agreement or "service level agreement" makes it possible to define the quality of service by setting indicators on the maximum resolution time of a ticket, or the passage to a certain step in a certain time. This is an option. If enabled, your teams will be alerted to the indicators to be met, and you will have access to detailed reports to track the performance of your SLAs and service level. Current Tickets: Displays all current tickets.
- My tickets: Displays all tickets of the active user.
- My team tickets: Displays all tickets of the active user’s team.
Introduction
Tickets not assigned: Displays all unassigned tickets.
Late tickets: Displays all late tickets.
Ticket history : Displays all tickets.
Reports: Displays reports: - Ticket: Ticket dashboards. - SLA: Dashboards concerning tickets subject to SLA rules.
Configurations: SLA charters: Allows you to configure SLA charters / Ticket types: Allows you to create ticket types.
Customer support
You will be able to open tickets, assign them to users and track their progress. It is also possible to manage the SLA.
Create a ticket
Customer support > Tickets in progress
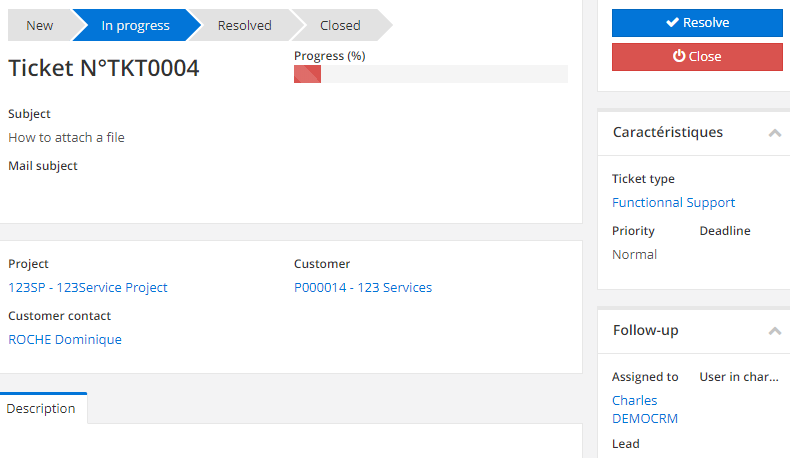
You must first give a name to the ticket in the "Subject" field. The ticket number will be generated automatically when the ticket is saved in a defined sequence. The sequences are configured in the Application Configurations > General Data > Sequences. You can then select a customer (and an associated contact), or a track that is at the origin of the ticket creation or concerned by it. The default start date and time is the time of ticket creation. It can be modified. The end date will be updated when the ticket is resolved. You can also specify a due date for this ticket. In the "Characteristics" panel, you can choose a ticket type (the types are to be created from the configurations) and a priority. When you create a ticket, it is in the "New" status. By clicking on the "Start" button, the ticket changes to the current status.

To make this ticket visible on the customer side, simply click on the "Assign to customer" button. You can also enter times spent from this ticket.
A ticket must be assigned to a person, or be taken over directly by the ticket creator by clicking on the 'Take over' button from the list view. You can also select a user in charge of the problem…