Sale orders
Before creating a sale order, make sure you are familiar with sale quotations. The sale quotation is necessary to create a sale order.
Confirmed order
A confirmed order is a quotation that has been finalized. These are the steps to finalize a sale quotation:
-
Click on the "Finalize" button.
-
Following this action, you will be no longer able to modify most of the quotation content.
-
Customer contact field is the only field that can be modified (but not the customer).
-
Each time a quotation is finalised, a pdf document is generated in the attachments section at the top of the page. This document contains the details of the quotation, allowing you to trace its history.
-
The finalized quotation must be signed by a customer.
-
Once the quotation has been signed by a customer, the quotation can change status to "Order confirmed".

Available actions
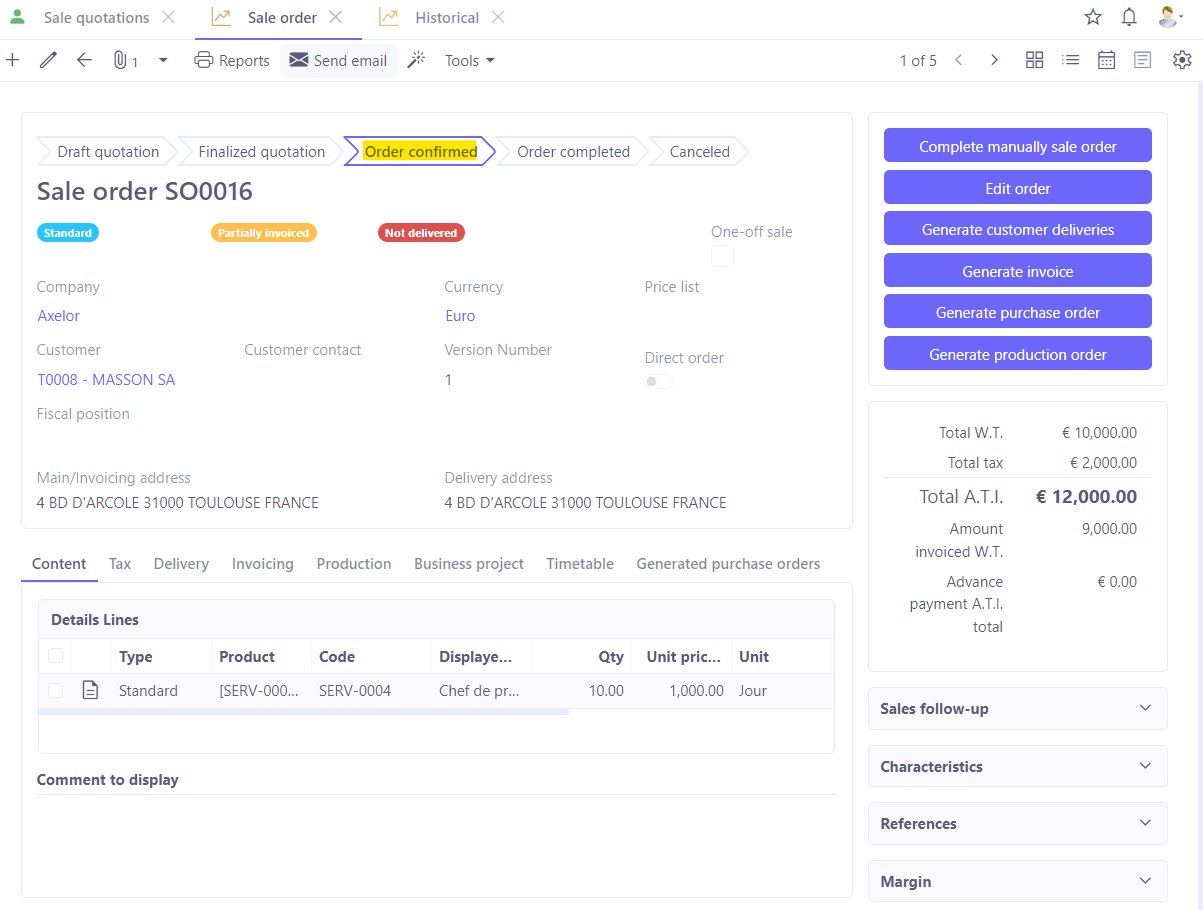
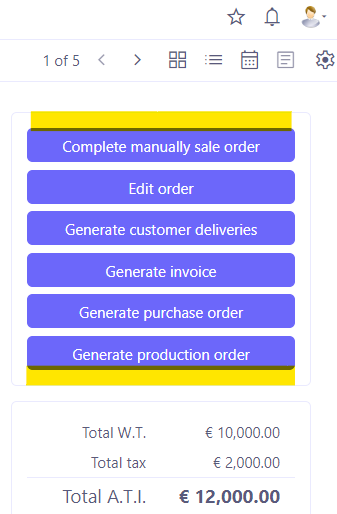
Once the order has been confirmed, new actions will become available:
- Complete manually customer order: clicking on this button changes the status to “order completed”. The order can be automatically switched to ‘Order complete’ status when the order has been delivered in full or when the order has been invoiced in full. These options must be activated in advance.
For delivery: Application config → Apps management → Supplychain, configure → in the Sale order section, activate the "Terminate sale orders on delivery" option.
For invoicing: Application config → Apps management → Supplychain, configure → in the Sales order section, activate the "Complete sale order when all has been invoiced" option.
- Edit order: this button activates the modification status. "Order being modified" message is then displayed on the quotation. When this status is active, it becomes possible to edit the content. Click on the "Validate changes" button to validate the changes.
Quantity changes can be blocked if a part of the order has already been delivered. This prevents inconsistencies.
-
Generate customer deliveries: this button is used to generate a delivery note that will be linked to the Stock app.
-
Generate Invoice: click on this button to generate an invoice which will be linked to the Accounting app.
-
Generate purchase order: click on this button to generate a purchase order that will be linked to the Purchases app.
-
Generate production order: this button is used to generate a production order that will be linked to the Manufacturing app.

Invoicing tab
Clicking on the ‘Generate invoice’ button results in a new table appearing in the Invoicing tab. In this table, you will find the list of all invoices.
Generated purchase orders tab
This tab contains a list of all supplier orders.
Timetable
You can choose to use a timetable for invoicing in this tab. Add billing deadlines for the order.
For example, you may decide to invoice in two instalments. The first invoice may be for 30%, and the second for 70%:
-
Click +New.
-
Select first date. Give it a title (Due date 1) and enter either the amount or the percentage. Entering the percentage will automatically calculate the amount. Confirm the line.
-
Add a second line. Fill in the information (Deadline 2) and this time enter the percentage at 70%.
-
Once the due dates have been configured, click on the "Generate invoice" button.
-
Invoice generation will offer 4 options:
-
Invoice all: if you choose to invoice all, you will not need to use the deadlines.
-
Invoice selected lines: choosing this action opens a wizard. You can then select and invoice only the lines concerned (by amount or percentage).
-
Invoice a deposit: Invoice a deposit to generate a deposit invoice.
-
Invoice by due date: lines with due dates that have been created can be selected. Select one of the due dates, for example the 30% due date. Click on ‘Generate invoice’.
- Validating and then releasing ("ventilating") the invoice in the Accounting app will be recorded in the customer quotation. When the invoice has been partially paid (invoice on schedule), a message will appear on the estimate page: ‘partially invoiced’.
Completing the sales order manually
Once everything has been processed on the order, you can manually end the sales order.
-
Complete manually sales order : click on the "Complete manually sales order" button. The message "Warning, a completed order cannot be modified. Do you want to continue?" will appear.
-
The quotation will change status to "Order completed".
-
A completed order is no longer visible from the Sale orders menu.
Quotation with the "Draft" and "Finalized" status are visible from the Sale quotation menu.
Confirmed orders are visible from the Sales order menu.
The History menu allows you to view all your quotation history, including that of cancelled or completed quotations.
Tools bar
Use the tools bar to perform different actions.
See quotation lines: Sales → Sale quotation → Tools → See quotation lines
See sale order lines: Sales → Sale orders → Tools → See sale order lines
See sale order lines (history): Sales → Historical → Tools → See sale order lines
Clicking on "Sale quotation lines" or "See sale order lines" allows you to view all the quote/order lines. This can be particularly useful for statistics: which products have been sold and at what price.
Export
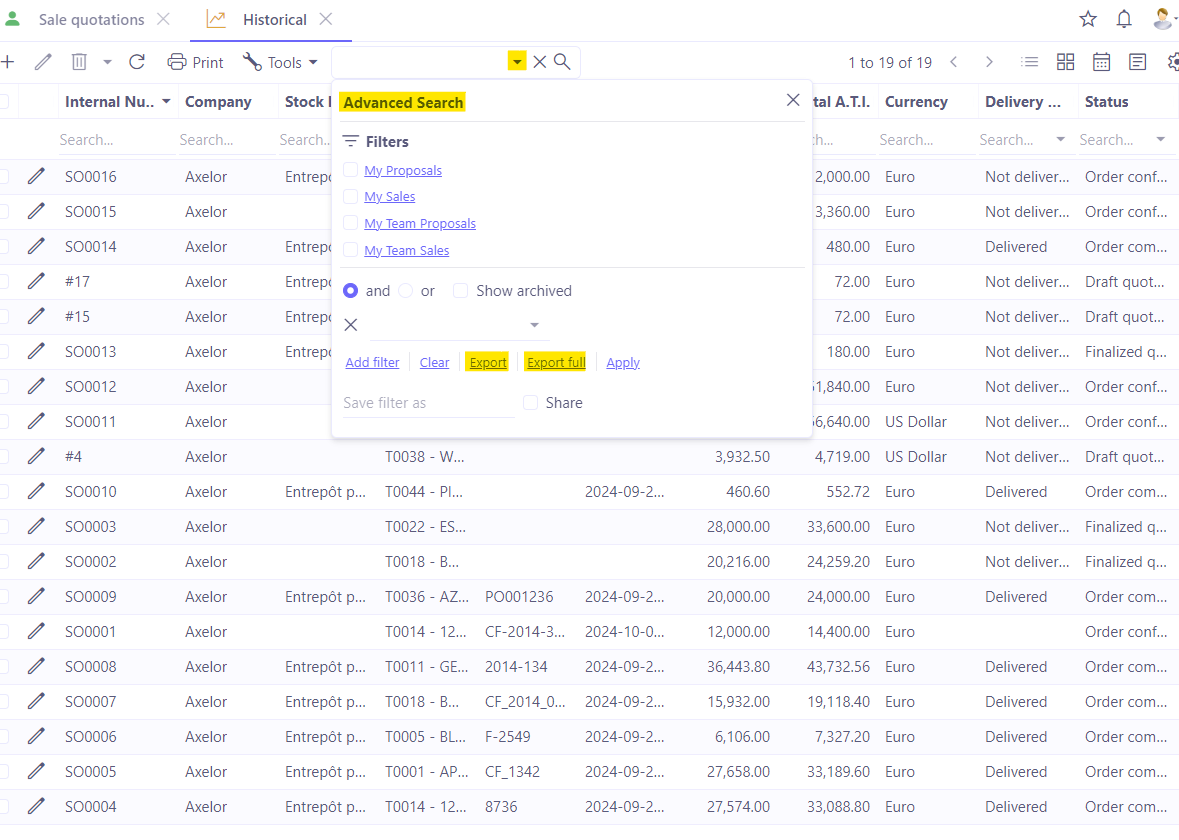
Click on the triangle icon at the top of the page in the Advanced search bar, and then click on "Export / Export full". Clicking on "Export" will allow you to export all the lines displayed on the page in csv format.
If you click on "Export full", all the lines (not just the ones displayed on the page) will be exported in csv format.
This action is available for sale quotation, sale orders and history records in the Sales app.
