Marketing
Introduction
The Marketing application allows you to create emailing and marketing campaigns. After creating your emailing template, and determining your target audience through the ability to filter your third parties, contacts and prospects, you can send your emailings directly from the application, without going through an external interface. Marketing campaigns can also be created and linked to your customers and prospects, allowing results to be monitored.
- Keywords :
- Campaign: a campaign is a set of marketing actions aimed at promoting your products/services. Axelor also allows you to create emailing campaigns and send them from the application.
- Target list: list of prospects or customers to whom you want to send your campaigns.
- Campaigns: Allows you to create and manage marketing and emailing campaigns.
- Targets: Allows you to create target lists in your database according to criteria you have defined.
- Configuration : Campaign types: Displays the different types of campaigns and allows you to create new ones Template: Allows you to create email marketing templates.
The targeting
Create target files
Marketing > Targets
Give a name to your target, you can choose to apply filters on partners or on leads. Then you can refine your search by field to filter and an operator to indicate how to filter this field. Once all your filters have been defined, you can click on the “Open filtered third parties” button. A new view opens and displays all third parties/contacts that match your search. You can also manually add additional third parties/contacts. The principle is the same for the tracks.
You can add as many filters as you want to your search to refine the results.
When you create a marketing campaign and choose this target model, the results of your query will be automatically updated. You can also create targets directly from a campaign.
You can also create a target model from a campaign.
Marketing campaigns
Create and plan marketing campaigns
Marketing > Campaigns
It is mandatory to give your campaign a name. Select a type of campaign (which must be created beforehand in “Configuration”) and determine start and end dates and select your previously created target template. A campaign can have different statuses: draft, scheduled, started, suspended, finished. Tracking is done either from a list or from a kanban view.
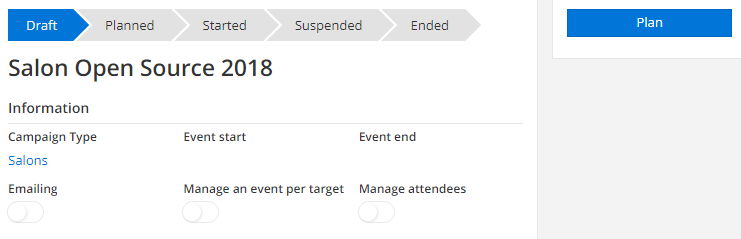
The “Allow the editing of the targets” button allows you to modify targets manually once activated.
You can create campaign types (webinar, website, social networks,…) in the configurations.
Carry out commercial actions
Marketing > Campaigns
The “Manage an event per target” button allows you to schedule sales actions: the event can be automatically assigned to the sales representative or the team in charge of the track/third party. In this case, in the “Events” tab of the campaign, tick the corresponding box. If the box is not ticked, you can manually select a team or a sales representative. The aim is to schedule an event in the calendar of the people concerned. The events scheduled and past on this campaign can be viewed in the tab “Targets to contact”, as well as on the files of third parties and tracks concerned by the event.
Manage participants
Marketing > Campaigns
The “Manage attendees” button allows you to invite targets to an event and track their registration and participation. First select your targets, then generate them. You can then invite all your targets or only those selected (in the “Target list” tab) with the corresponding buttons. In the “Results” tab, you will be able to indicate manually which targets participate or not, and thus provide for the sending of a reminder (provided that you have previously created reminder templates see the “Create customized emailing templates” feature). At the end of your campaign, in the “Attendance” tab, you can inform the real participants.
Evaluate the impact of marketing campaigns
If it is an event in which people will participate (a webinar, a conference, a trade show…), you can click on the “Manage attendees” button. In the “Results” tab you can add the leads and contacts that participated in your event, allowing you to evaluate the success of your marketing campaigns.
Emailing campaigns
Create custom emailing templates
Marketing > Configuration > Models
The type of media must be emailing, and the model must be Partner (for a third-party emailing model) or Lead (for a track emailing model). Then in the “To” field of the recipients, you must insert the formula $Partner.emailAddress.address$ if it is an emailing to third parties, and $Lead.emailAddress.address$ if it is an emailing to tracks. This formula will automatically retrieve the email addresses from your target list for sending.
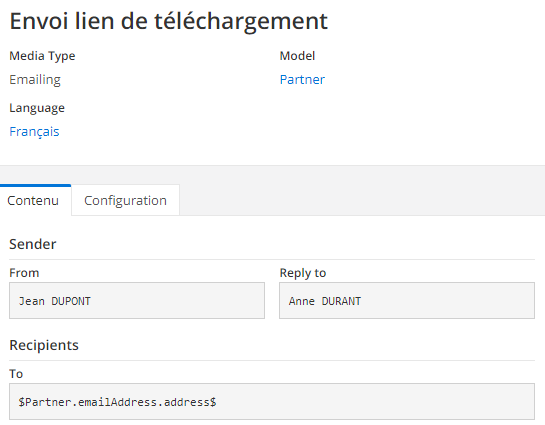
You can create emailing templates of different kinds: contact/third parties, track, customer reminder, track reminder and then select them on an emailing campaign.
For a mass email sending it is necessary to use a dedicated solution and configure the associated email account.
You can also configure mail templates.
Email accounts are configured in Application configuration > Message > Email accounts. You must enter the necessary information to activate your email account: server type, host, port, username, password…etc. This information can be consulted on the website of your emailing service provider.
Activate an emailing account�
Application configuration > Message > SMTP accounts
In order to be able to send an emailing, you must configure the emailing account through which the emails will be sent. For mass emailings, you must use the email account of an external emailing solution such as SendinBlue, Mailchimp, Mailjet…etc and therefore take out a subscription on a platform of this type. On the solution site, you will have access to the SMTP parameters to be entered in Axelor. To create a new SMTP account, you must give it a name, and configure it. You must select the type of server (SMTP, POP, IMAP), specify the host (ex: smtp-relay.sendinblue.com for Sendinblue or smtp.gmail.com for Gmail), activate SSL if necessary, and enter the port (depends on the emailing solution). To activate the emailing account, you must enter the email account ID and password. Once you have completed all the information, you must click on the “Test connection” button to check that it works. An alert message will tell you if the account is properly configured or if there is an error.
Send an emailing campaign
Marketing > Campaigns
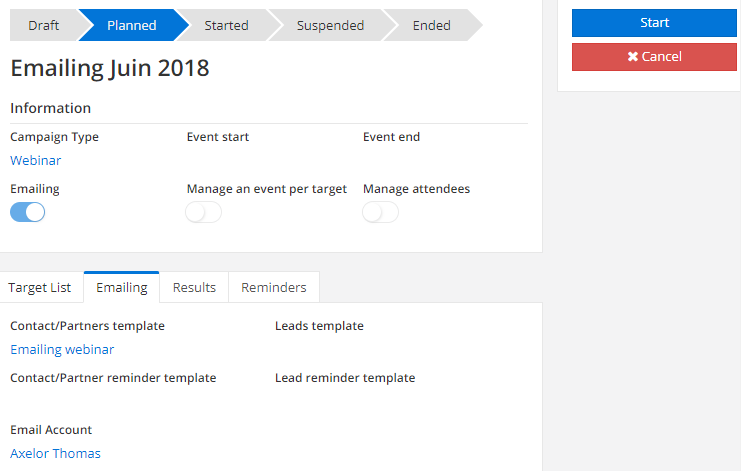
The principle is the same as for marketing campaigns, especially for the choice of target. However, you must check the “Emailing” box to define that it is an emailing campaign. Then you must select your emailing template and click on send to start your emailing.
Other functionalities
Automatically generate CRM events on targets
Marketing > Campaigns
Select the campaign concerned and click on the “Manage an event by target” button. The “Event” tab is then automatically added. The configured event is then generated en masse for the campaign targets.
If you want to generate events, not on the target, but on a particular sales team, check the box “Generate an event for the team in charge of the Third Party/Track”.