Analytic accounting
Configuration:
Access: Application Config → Users/Companies → Companies
Or "Companies" shortcut
In the company form, click on "Account config" in the right-hand column.
1.1. In the company form, click on "Account config" in the right-hand column.
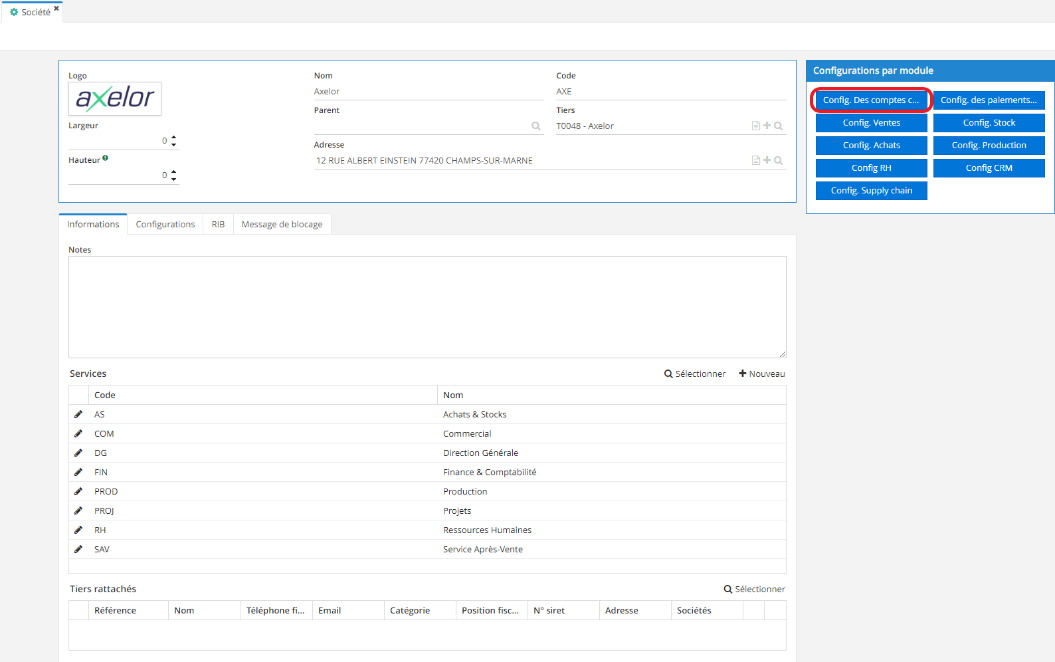
- Once you've clicked on the button, a new Account configuration window appears.
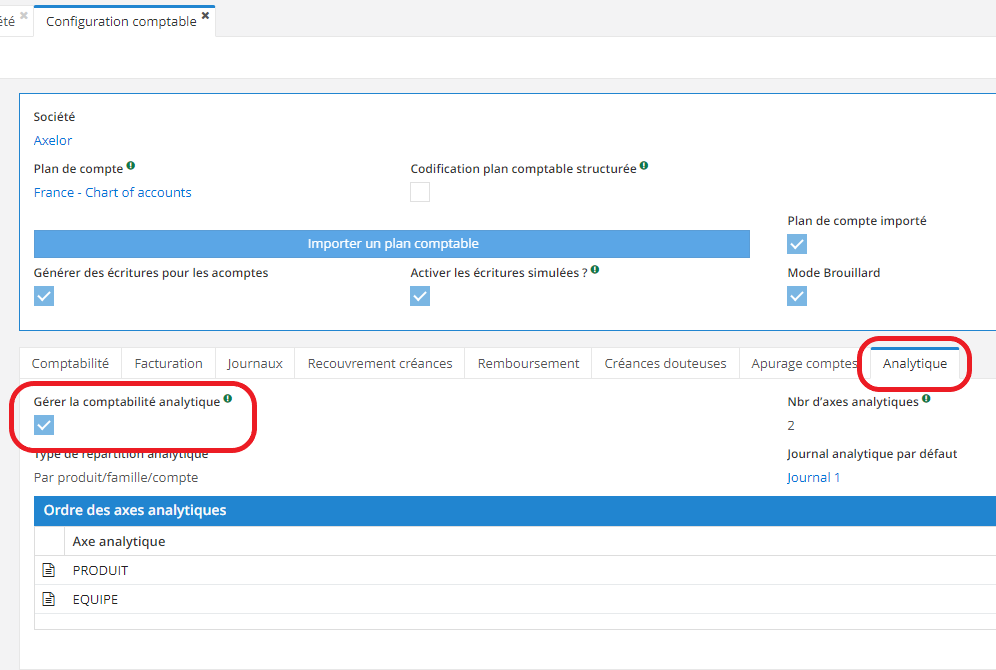
A new tab is now available in the Accounts setup window, the "Analytic" tab. Previously, Analytical Accounting could be configured globally. However, in the new version of the software, it can be configured by company.
- To activate analytical accounting, click on the "Manage analytic accounting" checkbox.
1.2. The Accounting Configuration page and the Analytic tab. By clicking on this tab, you can activate the "Manage analytic accounting" checkbox.
Axis in analytical accounting
The user can define the number of analytic axis. This number is used to define the number of columns in which it will be possible to directly enter the analytic account in order to record accounting moves/invoices.
You can also configure the following fields on the Accounting Configuration page, in the Analytics tab:
-
The number of analytical axis (limited to 5).
-
"Analytical distribution type" field: free, per partner, per product/family/account.
-
The "default analytic journal"
The different types of analytic distribution are :
1) Analytic distribution type "Free" allows the user to select the analytical model to be applied to the invoice line or accounting move.
2) "Per partner" you retrieve the partner's accounting configuration.
3) "Per product/family/account" you retrieve the analytical model directly from the product/family/account ("product" being more precise).
In the case of the "Default analytic journal", you should always use a single journal.
Once you have defined the "Number of analytic axis" on the Accounting Configuration page (via the Company), you can define the "Order of Analytical Axis". Axis numbering will follow the established order.
Access: Accounting → Configuration → Analytic → Analytic Axis
In the Analytic Axis repository, click on an axis of interest.
-
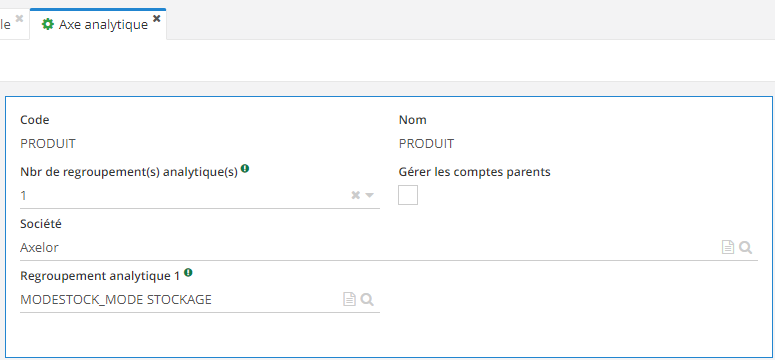
On the Axis form, it is possible to select a Company, but this field is not mandatory. If you don't select the Company, it becomes possible to apply this Axis with all the companies listed in the software.
-
"Nbr. of Analytic Grouping" field: used to group analytic accounts according to a specific value.
-
The "Manage Parent Account" checkbox. If the box is unchecked, the axis will operate on a single level. On the other hand, when the checkbox is ticked, the user can, for example, apply the grouping value (accounts on different levels and with different parents will be grouped together). Consequently, an axis can be linked to a group (Accounting → Configuration → Analytic → Analytic Groupings).
1.3. Analytic axis form.
Axis application example
Please note: the axis must already be configured before analytical grouping can be applied.
1) Access: Accounting → Configuration → Analytic → Analytic groupings. Next, create an analytical grouping according to your needs (for example, Storable and Non-storable).
-
On the Analytic Grouping form, fill in the necessary information. Enter the Group Code and Name (for example, the Storage mode for both fields).
-
Select the analytic axis (e.g. Product).
-
Create new "analytic grouping values" (here, the first value is Stock and the second is Non-Stock).
-
Save your changes.
2) Access: Accounting → Configuration → Analytic → Analytic Axis
-
Click "Edit" on the line of the analytic axis you wish to use.
-
On the analytic axis form, select Analytic grouping
-
Check the "Manage Parent Account" box.
3) Next, open the analytic account form.
Access: Accounting → Configuration → Analytic → Analytic accounts
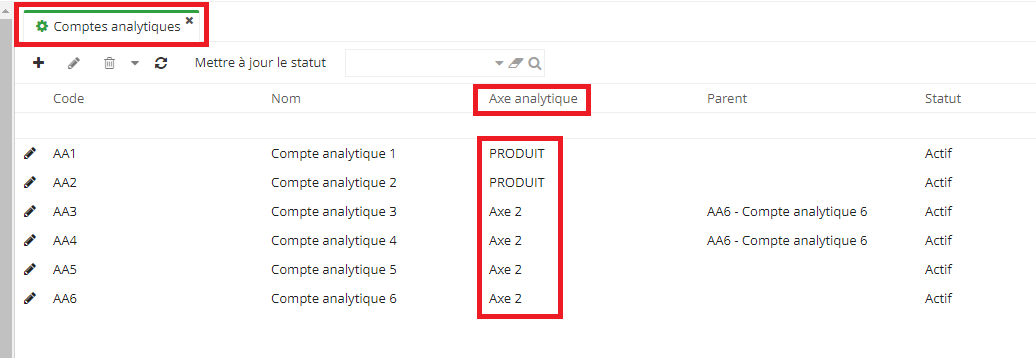
In the repository, before opening the form, you can see to which analytic axis the account is associated (for example, Product). .
1.4. The analytic accounts repository. The list shows the analytic axis to which each account is linked.
- The analytical level gives us structure. Multiple levels are possible. For example, you can create three levels, with level 3 being the highest and level 1 the lowest.
Keep in mind that analytical levels are controlled by the software to avoid jumps between levels. You can go up to 10 levels.
-
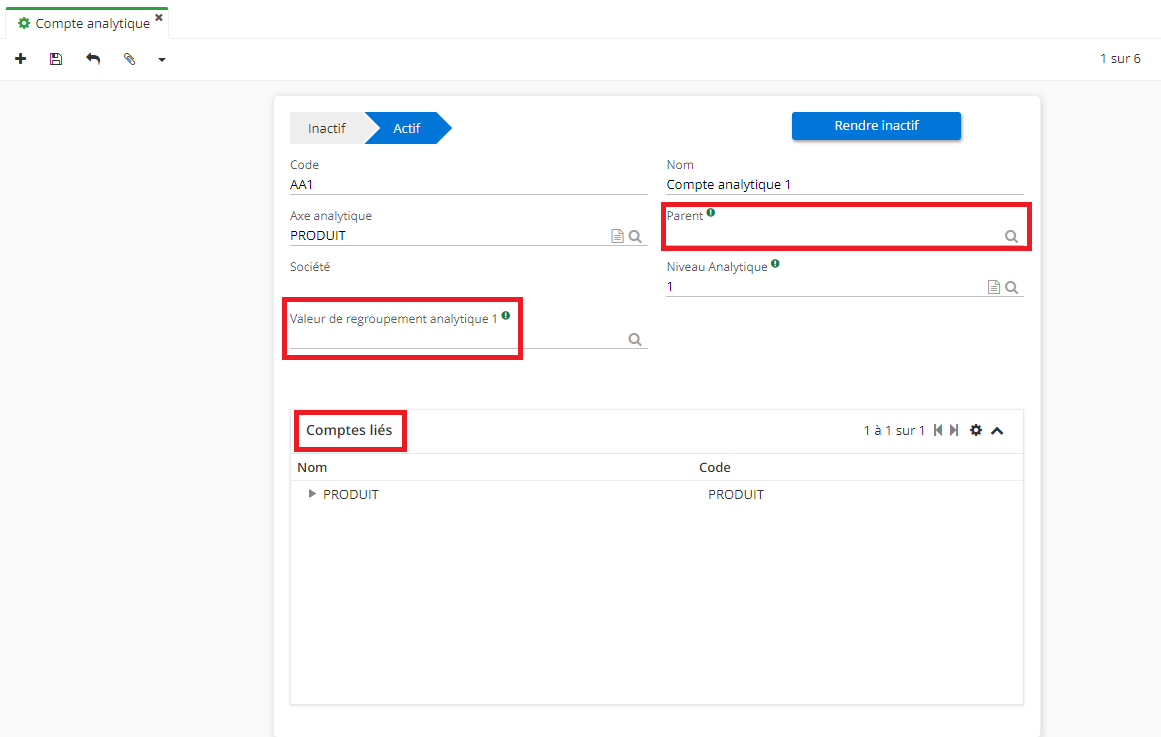
The "Parent Analytic Acc." field appears on the analytic account form, because you have activated the "Manage Parent Account" checkbox on the Analytic Axis form.
-
It is not possible to edit the company on the analytic account form, as the company is linked to the analytic axis.
-
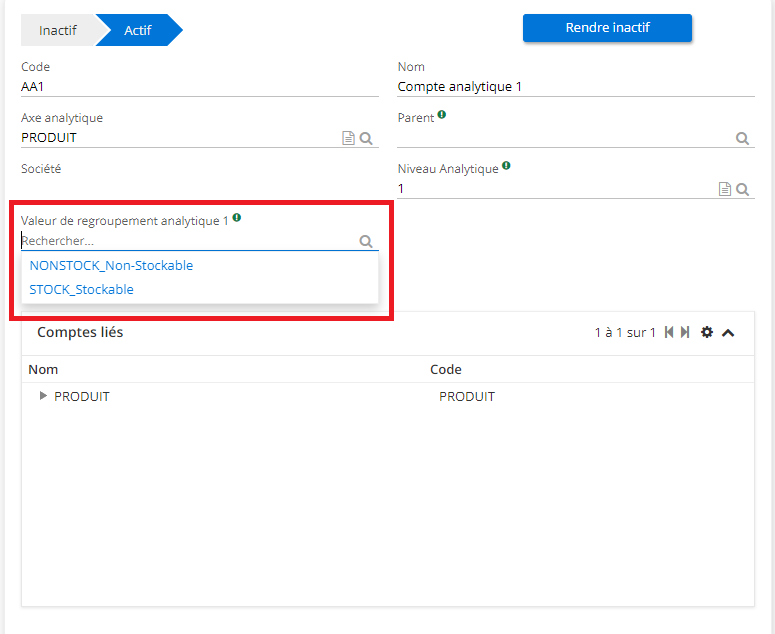
Select the analytic grouping value. The values proposed in the drop-down list are those defined on the analytic axis.
-
If the company doesn't appear, the axis is shared.
-
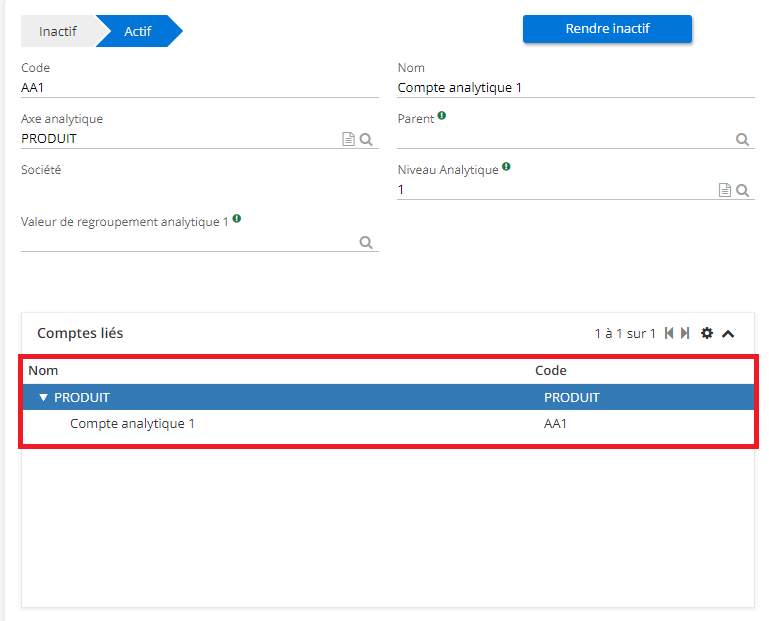
In the "related accounts" area at the bottom of the page, you can see where the analytic account is positioned (tree view).
1.5. Analytic account form with fields to fill in. Please note that the "Parent Analytic Acc." field only appears if the "Manage Parent Account" checkbox is enabled on the analytic axis form.
1.6. List of analytic grouping values.
1.7. Analytic account positioning (tree view).
Analytic accounting
Access: Accounting → Configuration → Analytic → Analytic accounts
On the analytic account form:
-
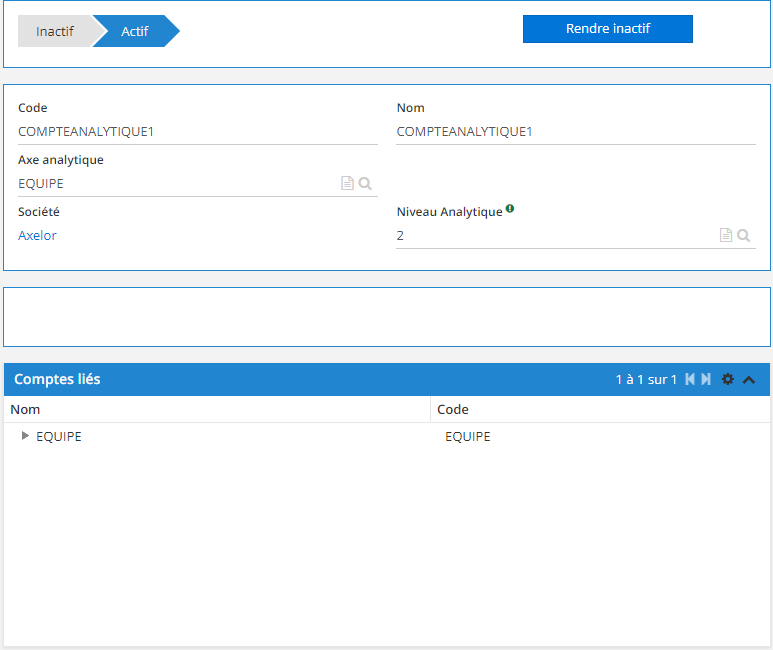
possibility of enabling / disabling the account from the file. Inactive accounts become impossible to select.
-
The "Parent Analytic Acc." field (on the associated Axis form, the "Manage Parent Account" box must be enabled).
-
Analytic level field: used to structure. Linked to parent account.
-
The company is indicated on the form, but cannot be modified as it is associated with the axis. If the company doesn't appear, the axis is shared.
-
In the related accounts area at the bottom of the page, you can see where the analytic account is positioned (tree view).
1.8. Analytic Account form.
Financial Accounts
Access: Accounting → Configuration → Financial → Financial Accounts
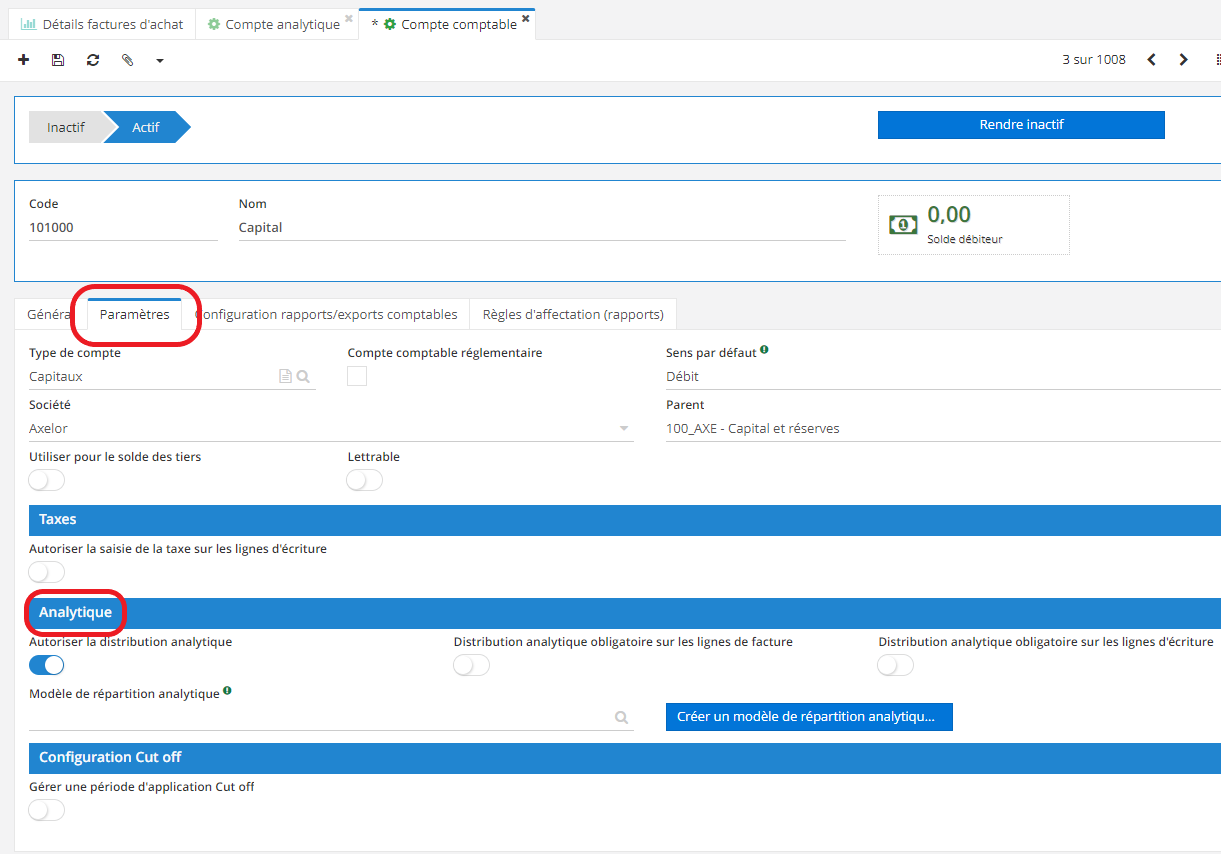
On the financial account form, by clicking on the "Settings" tab, you will access the "Analytic" section, which contains the following checkboxes:
-
Analytic distribution authorized (the other checkboxes will then appear).
-
Analytic distribution required on invoice lines.
-
Analytic distribution required on move lines.
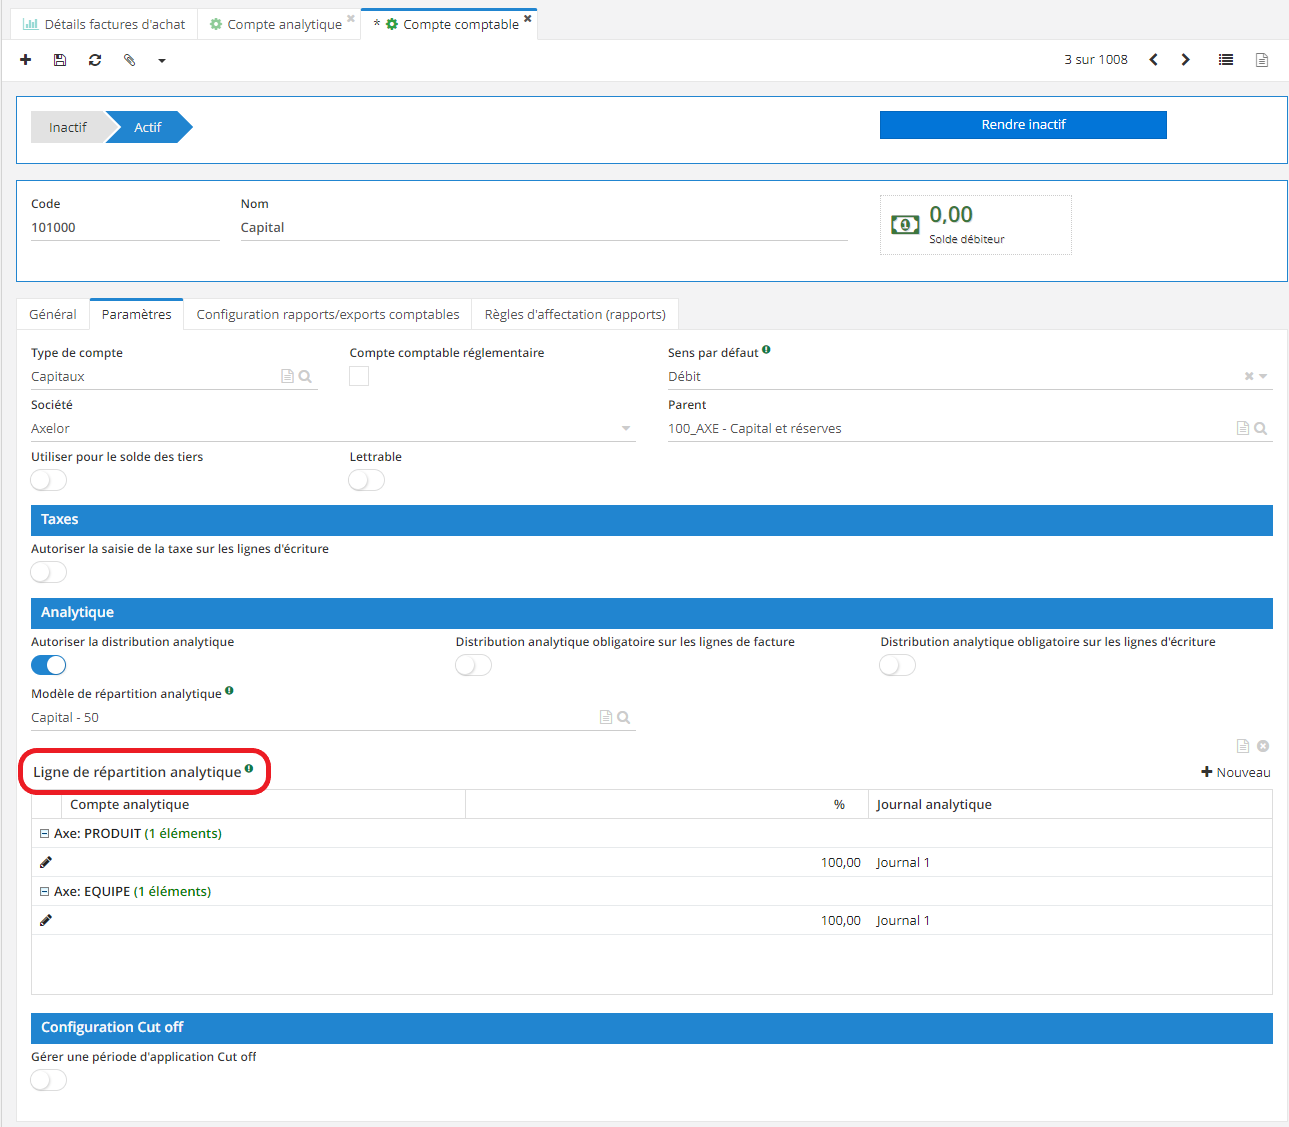
In the "Settings" tab / Analytic section you'll also find the "Analytic Distribution Template" field and the "Create personalized analytic template" button.
When you click on the "Create personalized analytic template" button, a new view appears: Analytic distribution lines. In this dedicated area, you can enter the axis directly according to the product/team.
1.9. Financial account form, Settings tab, Analytic section and the checkboxes it contains (note: first check "Analytic distribution authorized" to display the other checkboxes).
2.1. When you click on the "Create personalized analytic template" button in the analytic section of the settings tab on the account form, a new view called "Analytic distribution lines" appears.
Account move.
1) On the form for a new account move:
At the bottom of the page, under the heading "Move lines", you'll see the two axis that have been created in the "analytic distribution lines".
Fill in the required fields, some of which will be pre-filled automatically. Select the journal (e.g. Purchasing).
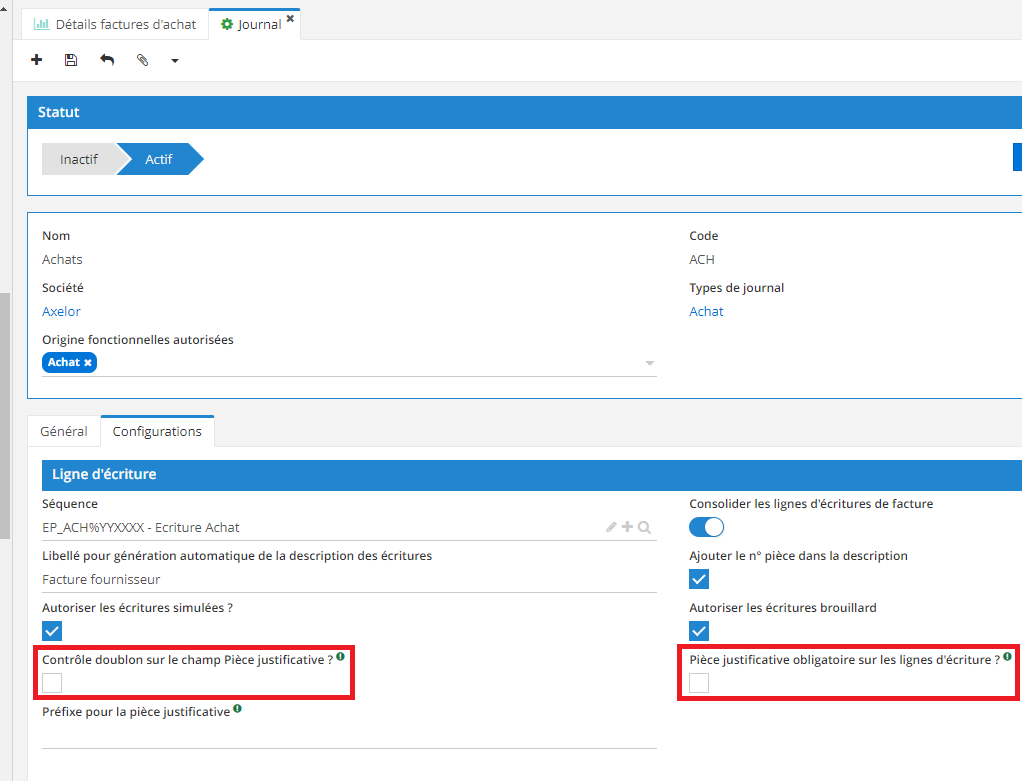
On the journal form that will be used for the account move, you can activate the "Check duplicate entry on accounting voucher" and "Accounting voucher required on move lines" boxes.
When duplicate checking is activated on the journal form, and you have indicated the voucher reference on the move form, this will enable you to avoid the creation of two sales invoices with the same number.
2.2. In the journal form, click on the "Configurations" tab. Next, you can check the "Check duplicate entry on accounting voucher" and "Accounting voucher required on move lines" boxes.
2) Then, on the account move form, enter the account number in the move lines table.
Therefore, automatically, as you have indicated "by product/family/account" in the Accounting Configuration form, the software has identified the analytic distribution template, as the "Analytic distribution authorized" box has been activated.
How do I activate the "Analytic distribution authorized" checkbox?
1) On the accounting move form, at the bottom of the page, in Move lines, select the Account.
Next, click on the financial account to access the financial account tab, and check the "Analytic distribution authorized" box.
On the other hand, if you click on the line, you'll see the move line. You can also view the Analytic Distribution Template by clicking on the line.
2) Once everything has been configured and the fields filled in on the account move form, you can click on "Generate counterpart".
The account move is ready, so you can click on "Daybook".
As a result, analytical moves were generated directly in the system on the basis of the distribution template.
Invoice
1) On the invoice form, complete the fields.
2) When you add an invoice line and click on the line, the "Invoice line" tab will open. Then, still on the tab, click on Analytic, and you'll see that the analytic distribution template has been automatically selected (via the configuration of the financial account applied to the invoice). However, it is still possible to consult or select the Analytic distribution template.
3) You can then validate - passed for payment validation - ventilate the invoice.
By clicking on the generated move lines, in the move line tab, you can view the analytic distribution lines (the analytic distribution tab).
for the operation to work correctly, the "Analytic distribution authorized" box must be activated on the financial account applied to the invoice, and the analytic distribution template must be selected.**