DMN Visual Editor
Introduction
The DMN visual editor is a React-based graphical environment that allows you to design Decision Requirements Diagrams (DRDs) and configure decision tables. It is built on the dmn-js library and provides a complete editing experience including a palette, properties panel, and toolbar.
The editor opens in a dedicated view at the URL bpm/?type=dmn&id={model_id}.
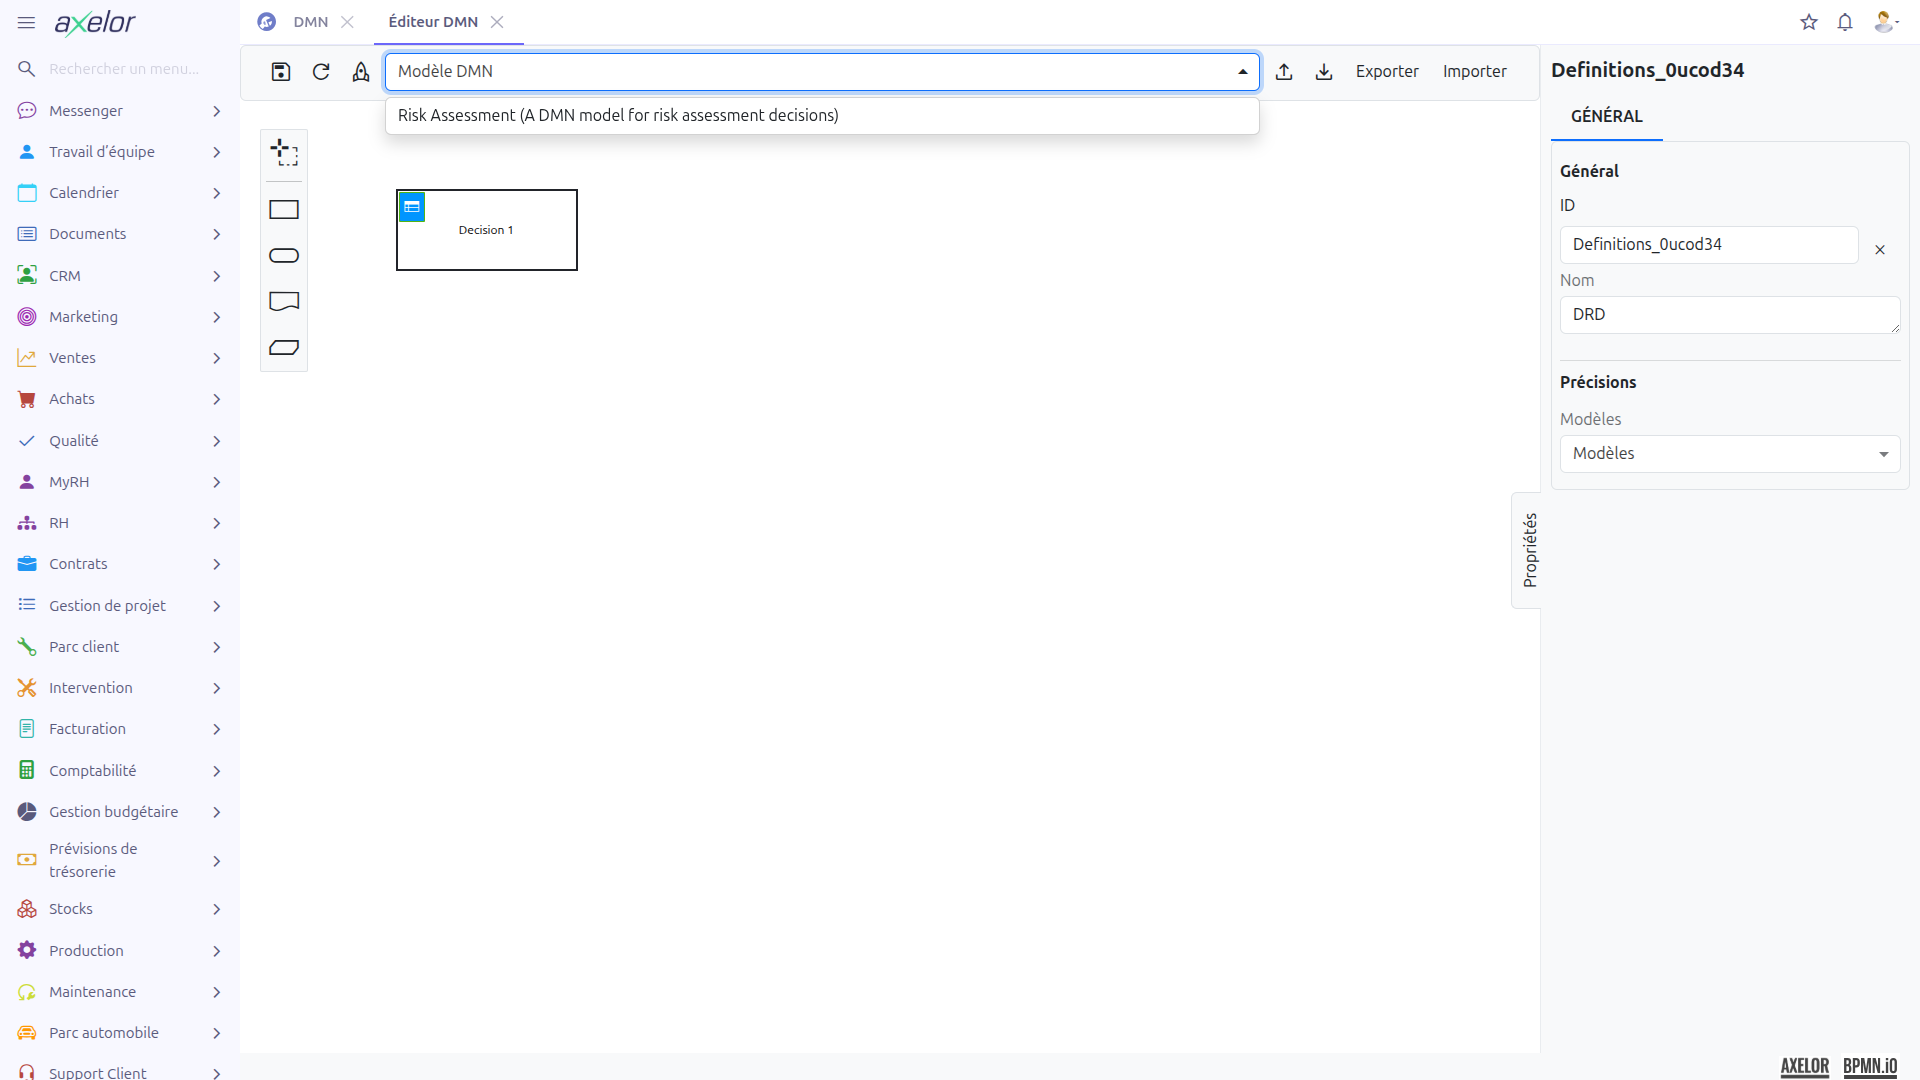
Opening the Editor
The DMN editor can be opened from two locations:
-
From the DMN model grid view: click the pencil icon (Open editor) on a row
-
From the DMN model form view: click the Open editor button in the form header
| You must save the DMN model before opening the editor. Any unsaved changes on the form will not be reflected in the editor. |
Editor Layout
The editor is divided into three main areas:
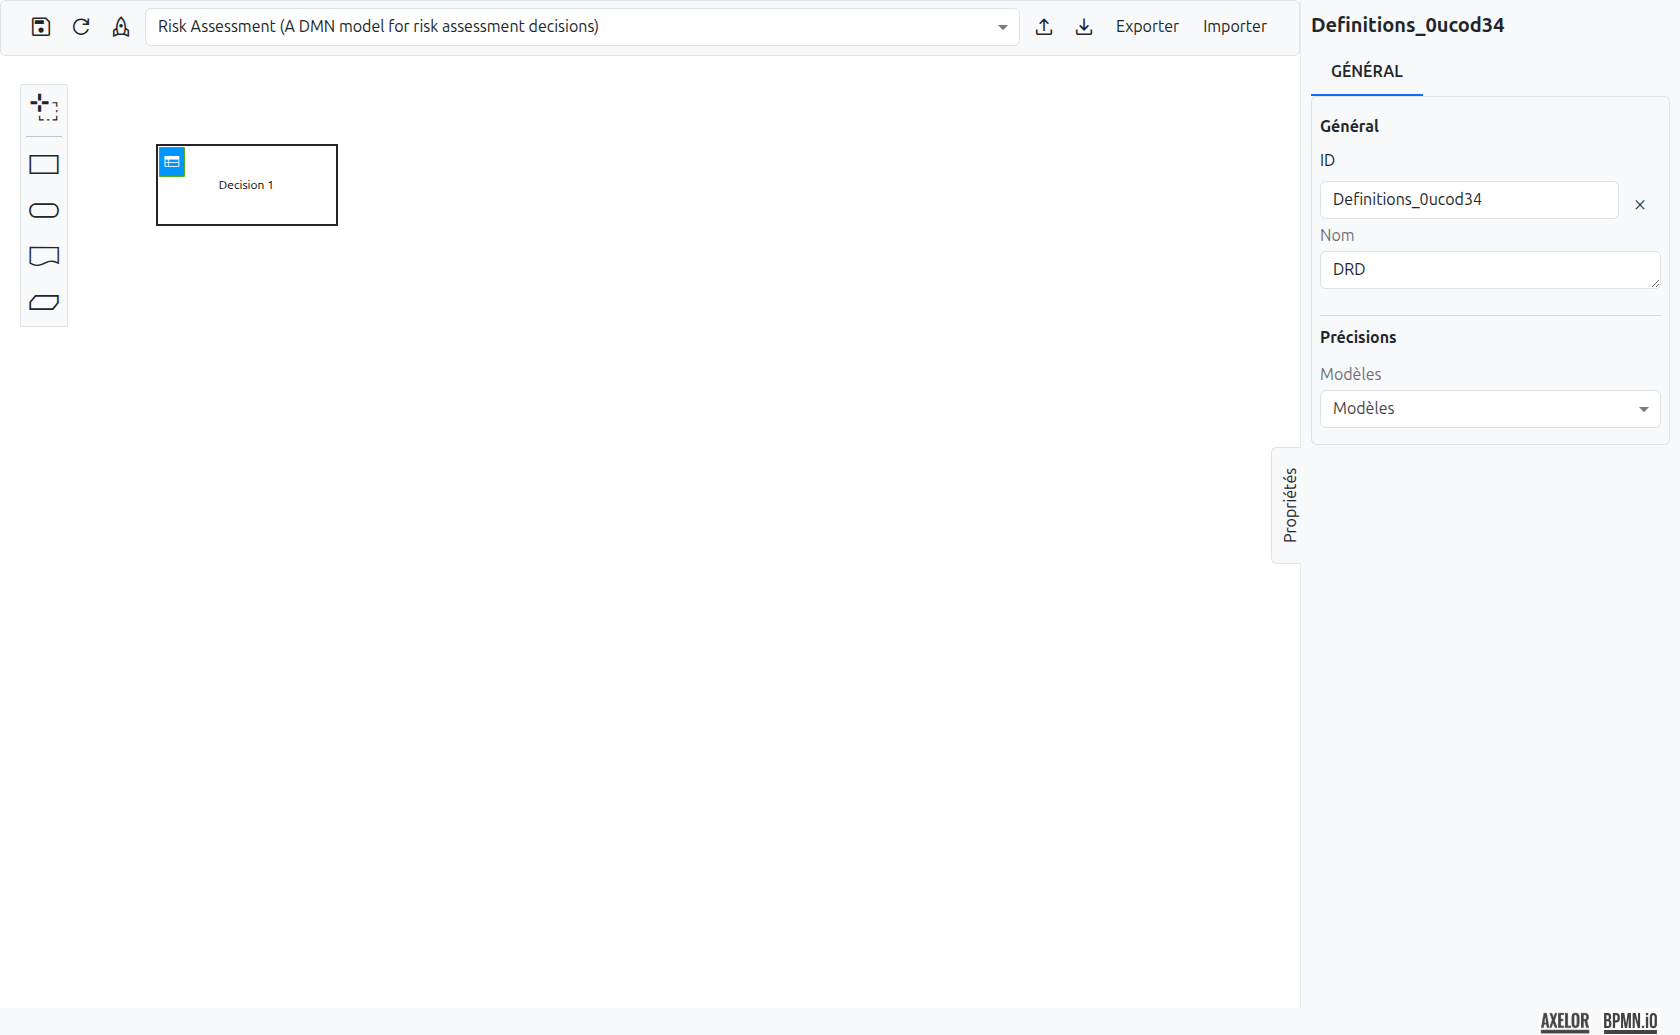
-
Top bar (1): Contains the toolbar actions and the model selector
-
Canvas (2): The central drawing area where DRD elements are placed and connected
-
Properties panel (3): The right-side panel showing the configuration of the selected element
Toolbar
The toolbar provides the following actions:

Left-Side Actions
| Action | Icon | Description |
|---|---|---|
Save |
Save icon |
Saves the current DMN XML to the server. The diagram is serialized and stored in the |
Refresh |
Refresh icon |
Reloads the diagram from the server. If there are unsaved changes, a confirmation dialog is displayed to warn before discarding them. |
Deploy |
Rocket icon |
Saves the current diagram and then deploys it to the Camunda DMN engine. This is equivalent to clicking Save followed by Deploy on the form view. |
View DRD |
Text button |
Switches from the decision table view back to the DRD (diagram) view. This button is only displayed when you are editing a decision table. |
Right-Side Actions
| Action | Icon/Text | Description |
|---|---|---|
Upload |
Upload icon |
Uploads a |
Download |
Download icon |
Downloads the current diagram as a |
Export |
"Export" text |
Exports all decision tables as an Excel file (.xlsx). See Import and Export for format details. |
Import |
"Import" text |
Opens a dialog to import decision table data from an Excel file (.xlsx). See Import and Export for format details. |
| The Refresh action warns you before discarding unsaved changes. Always save your work before refreshing if you want to keep your modifications. |
DRD View
The DRD (Decision Requirements Diagram) view is the default view when opening the editor. It shows the visual diagram of all decisions and their relationships.
Palette
The palette is located on the left side of the canvas. It provides the following elements:
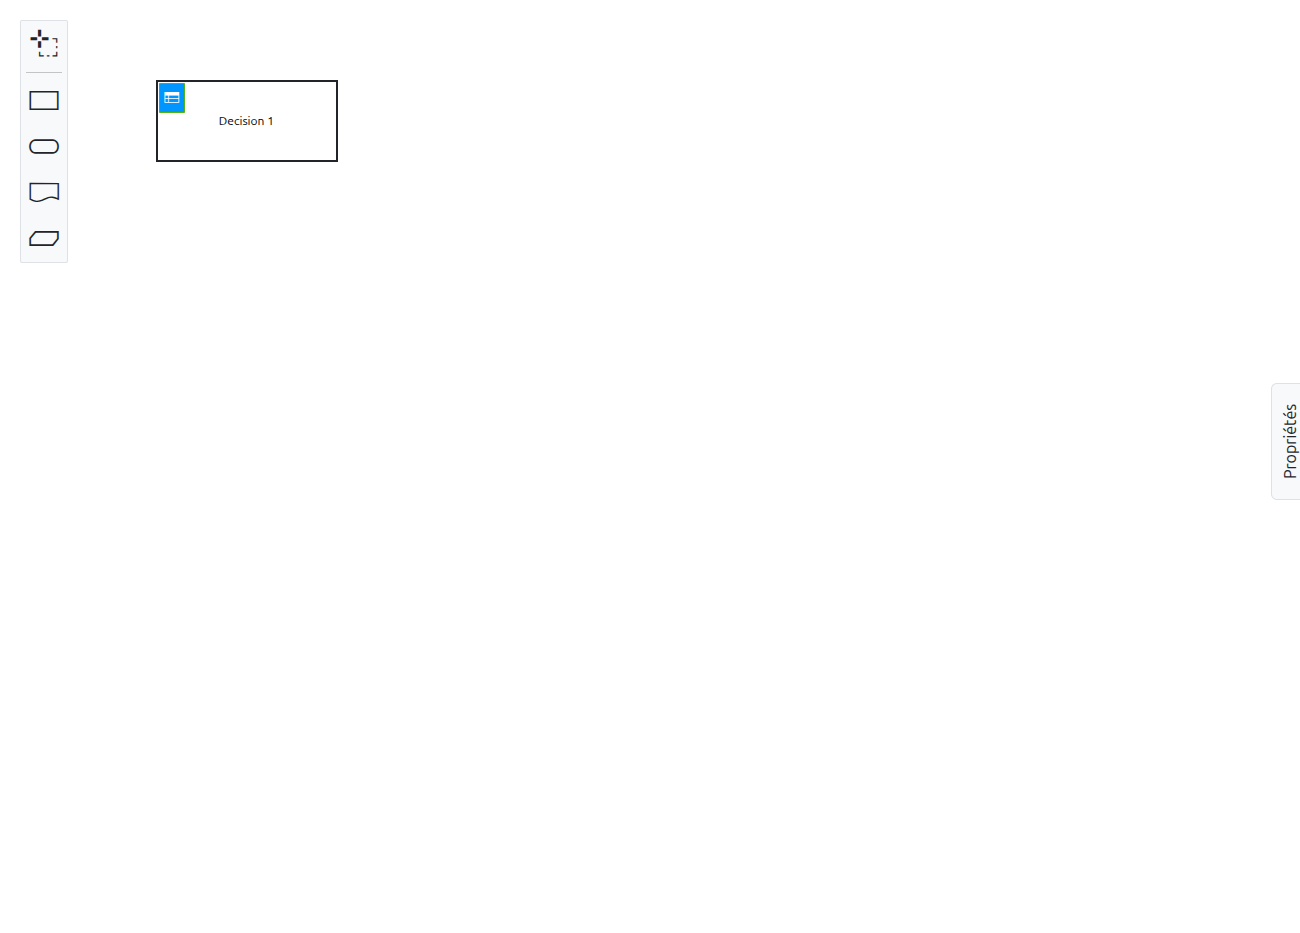
| Icon | Element | Description |
|---|---|---|
|
Lasso tool |
Activates the lasso selection tool, allowing you to select and move multiple elements at once. |
|
Decision |
Creates a new Decision element. When placed, it automatically includes a decision table with one input column (type: string) and one output column (type: string). |
|
Input Data |
Represents the data required to execute a decision. This is a visual-only element for diagram readability — it has no effect on execution. |
|
Knowledge Source |
Indicates the source of knowledge used to define the decision logic. Visual-only, no effect on execution. |
|
Business Knowledge Model |
Represents reusable business logic. Visual-only, no effect on execution. |


| You can connect elements using information requirement arrows (solid lines) or authority requirement arrows (dashed lines) by dragging from a source element to a target element. |
DRD Properties Panel
When no element is selected, the properties panel displays the DRD-level properties:
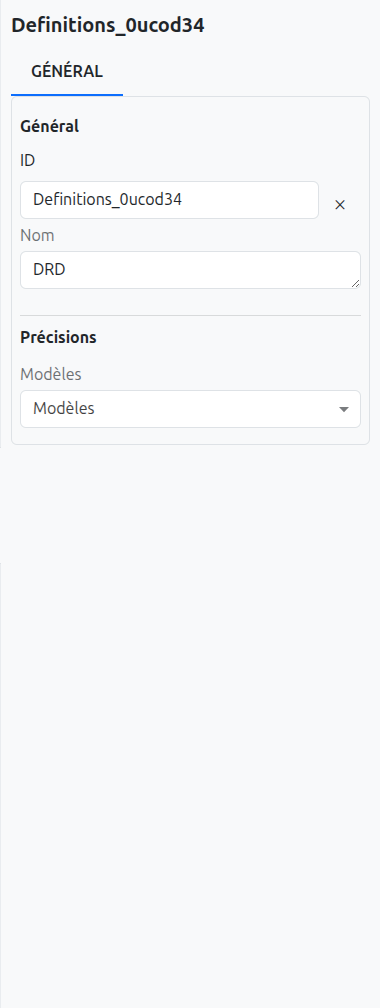
| Property | Description |
|---|---|
Id |
The unique identifier of the DRD (definitions element). Auto-generated, can be modified. |
Name |
The display name of the DRD. |
Version Tag |
An optional version tag for the DRD. |
History Time To Live |
Defines the duration for which history data is retained after the decision is evaluated. |
Model Selection at DRD Level
The properties panel at the DRD level also includes model selection fields:

-
MetaModel: Multi-select for standard data models. These are stored as custom attributes on the DMN definitions element.
-
MetaJsonModel: Multi-select for custom JSON models.
These model associations define which data models are available as context when executing DMN decisions independently (outside of a BPM process). They are synchronized to the WkfDmnModel entity during deployment.
Navigating Between DRD and Decision Tables
To edit a decision table:
-
In the DRD view, click on a Decision element
-
Click the element again (or double-click) to drill down into the decision table editor
To return to the DRD:
-
Click the View DRD button in the toolbar (visible only when in decision table view)

Decision Table Editor
When you drill down into a Decision element, the decision table editor is displayed. This view allows you to configure input/output columns and define rules.
For detailed information on configuring decision tables, see Decision Table Configuration.
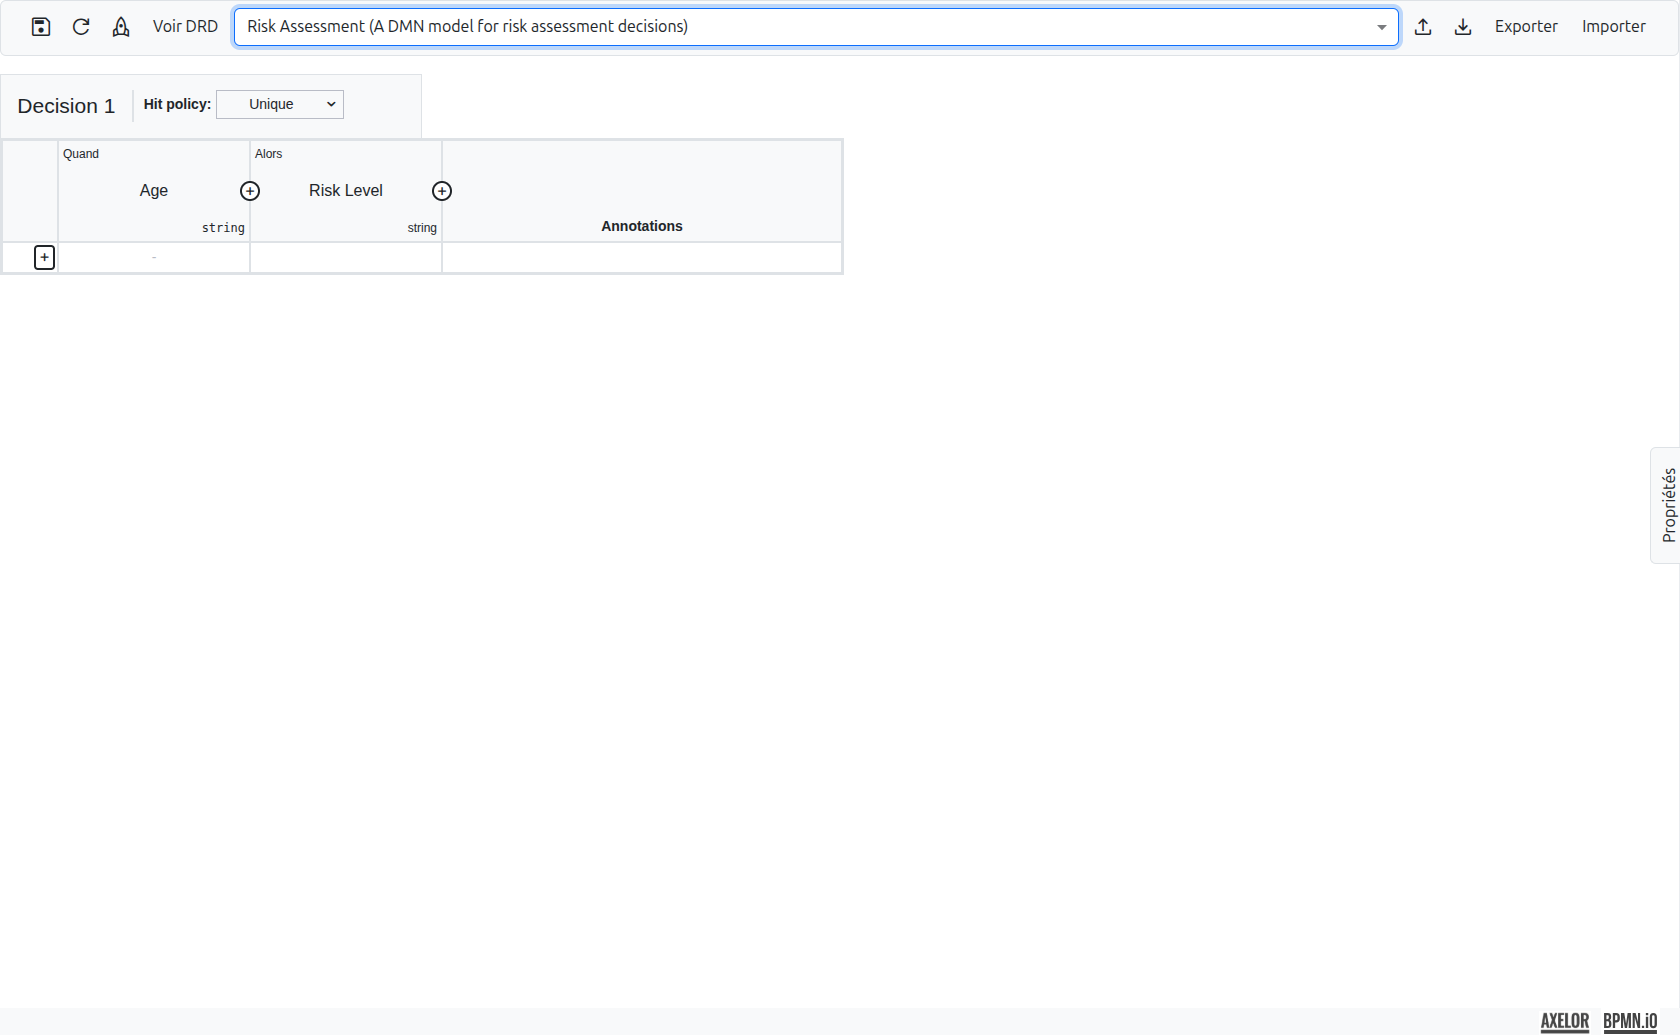
Diagram Migration
The DMN editor includes automatic diagram migration support via the @bpmn-io/dmn-migrate library. When opening a DMN diagram created with an older DMN version, the editor automatically migrates it to the current version.
| This migration is transparent and does not require any user action. |